When customers need to send products back to your fulfillment center—whether due to returns, exchanges, or Return to Sender (RTS) shipments—you can create return orders through the Jetpack dashboard, integration platforms, or API. Each method provides flexibility for managing incoming inventory while maintaining visibility throughout the return process.
How to Create Return Orders
Jetpack offers three methods to create merchant-initiated returns, each designed for different workflow needs.| Method | Description | Best For |
|---|---|---|
| Manually | Create returns directly from the Orders page or Returns page in the Jetpack dashboard | Individual returns, RTS shipments, or when you need complete control over return details |
| Automatically via Integration | Use a Jetpack-supported returns platform integration such as AfterShip or Loop | High-volume returns with automated customer return portals |
| Via API | Utilize the Jetpack API to automate return order creation programmatically | Custom workflows, automated return processing, or integration with your own systems |
Return Order SLA
All return orders are processed according to Jetpack’s standard service level agreement. Click here to review the SLA for returns.Creating a Return from the Order Details Page
Follow these steps to create a return order directly from any shipped order in your Jetpack dashboard:Access the Actions menu and select Create Return
From the Order Details page in the Jetpack dashboard, click the Actions button, then select Create Return from the drop-down list.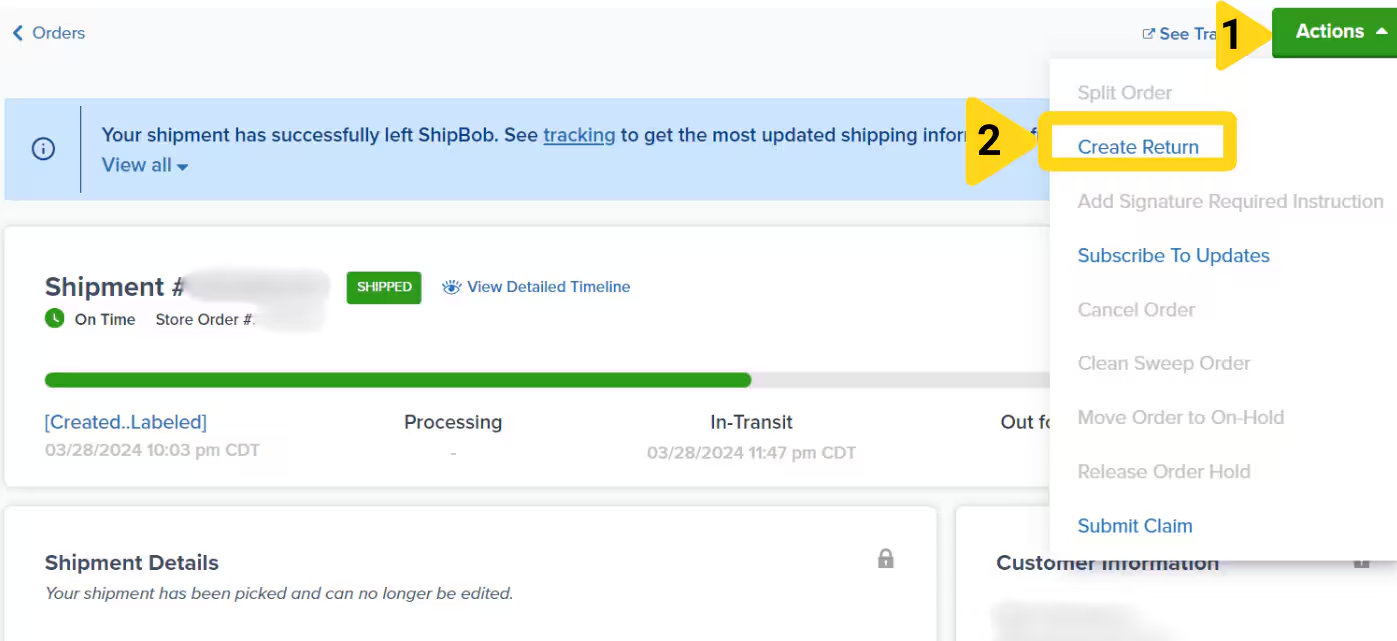
This option becomes available only once the order has shipped. If the order is not yet shipped, the option will be grayed out.
Modify returned items
Adjust which products are being returned and specify the return action for each: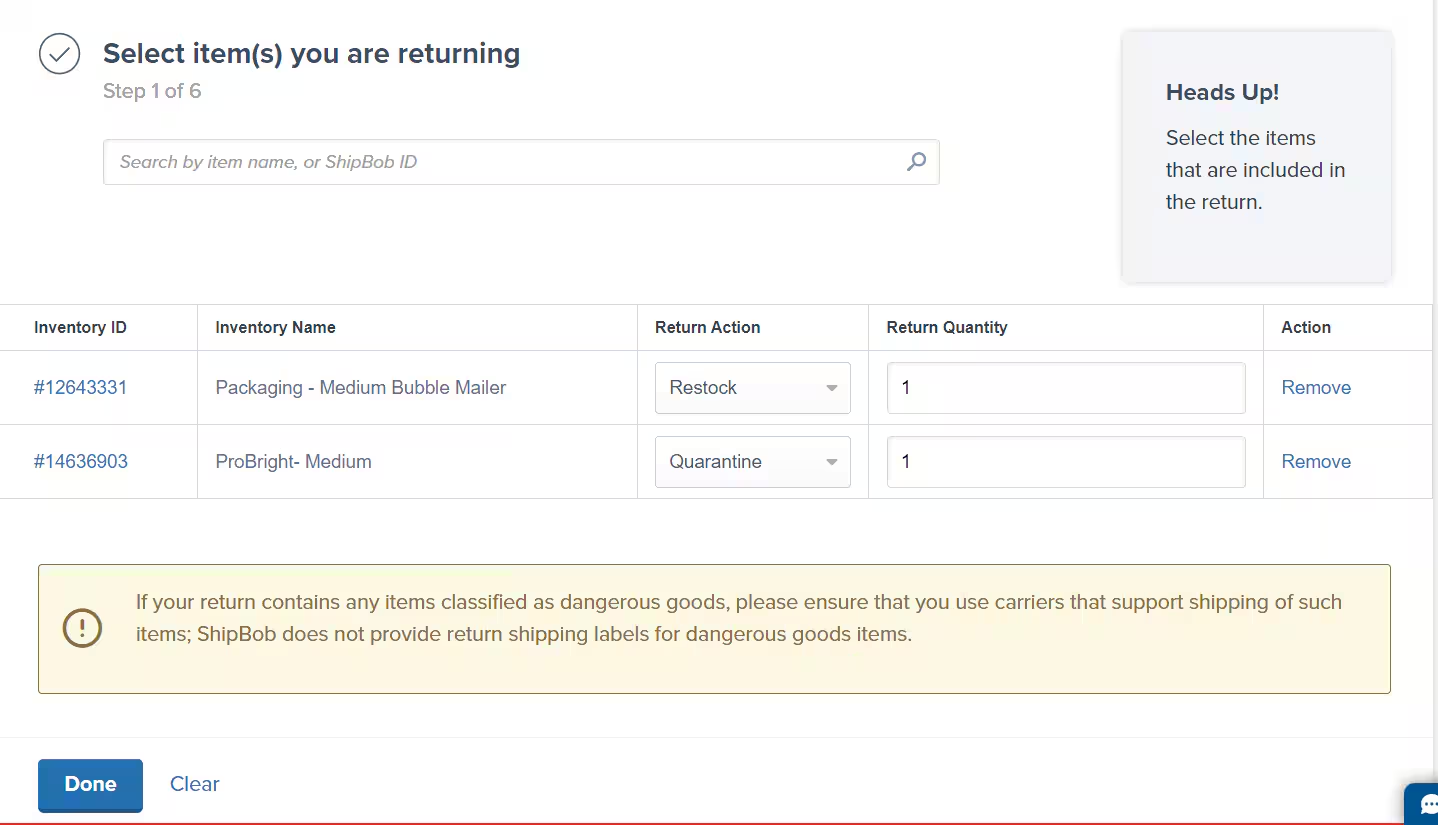
- Add Products - Use the search bar and select additional products if needed
- Remove Products - Click the Remove button next to any product not being returned
- Update Quantities - Ensure the number under the Return Quantity column reflects the actual units being returned
- Return Action - Use the drop-down menu to override the default Return Preference (applies to all units of a product)
Choose destination fulfillment center
Choose the destination fulfillment center from the drop-down menu.
Enter Reference ID (RMA)
Enter the Reference ID (RMA): A unique alphanumeric Reference ID must be provided (minimum 8 characters; maximum 46).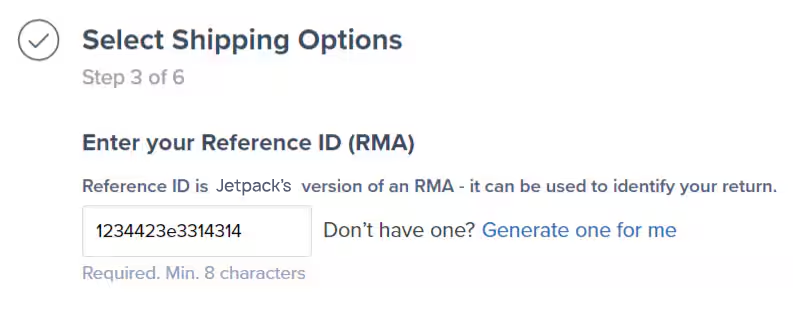
Select label type
After entering a valid RMA, select a label type: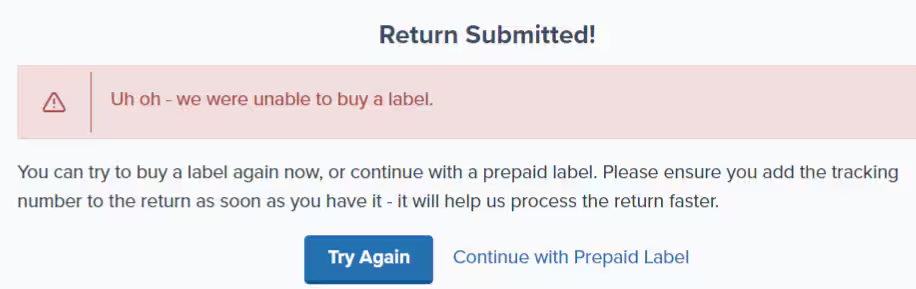
- Prepaid Label - Purchase a shipping label directly from a carrier. Provide the tracking number on the return order details page before the order arrives at the fulfillment center.
- Purchase ShipBob Optimized Label - ShipBob selects the cheapest carrier at the time of return order creation. If you receive an error when trying to select this option, you can try the Purchase Carrier Specific Label option first, and if you continue to receive the error, select Prepaid Label.
- Purchase Carrier Specific Label - You select the carrier that will ship the order.
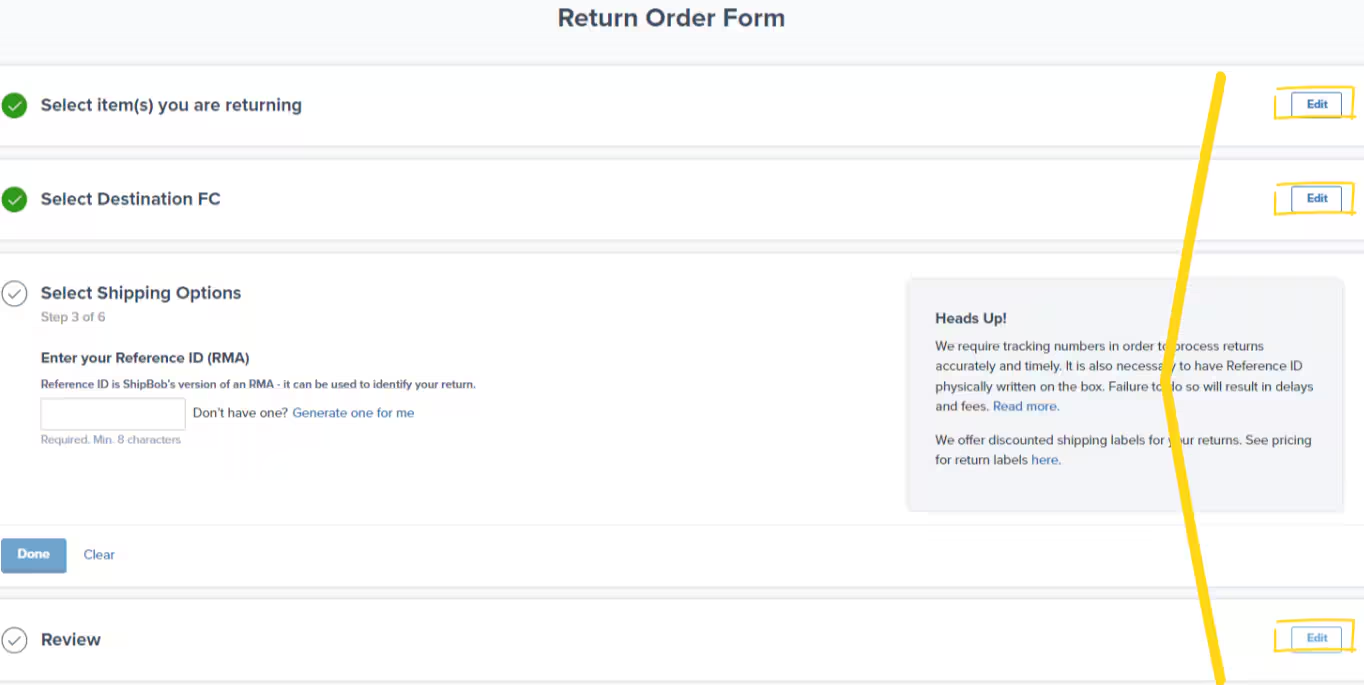
Review return order details
Review the return order details on the Return Order Form. The form shows all completed steps with green checkmarks and allows you to edit any section if changes are needed.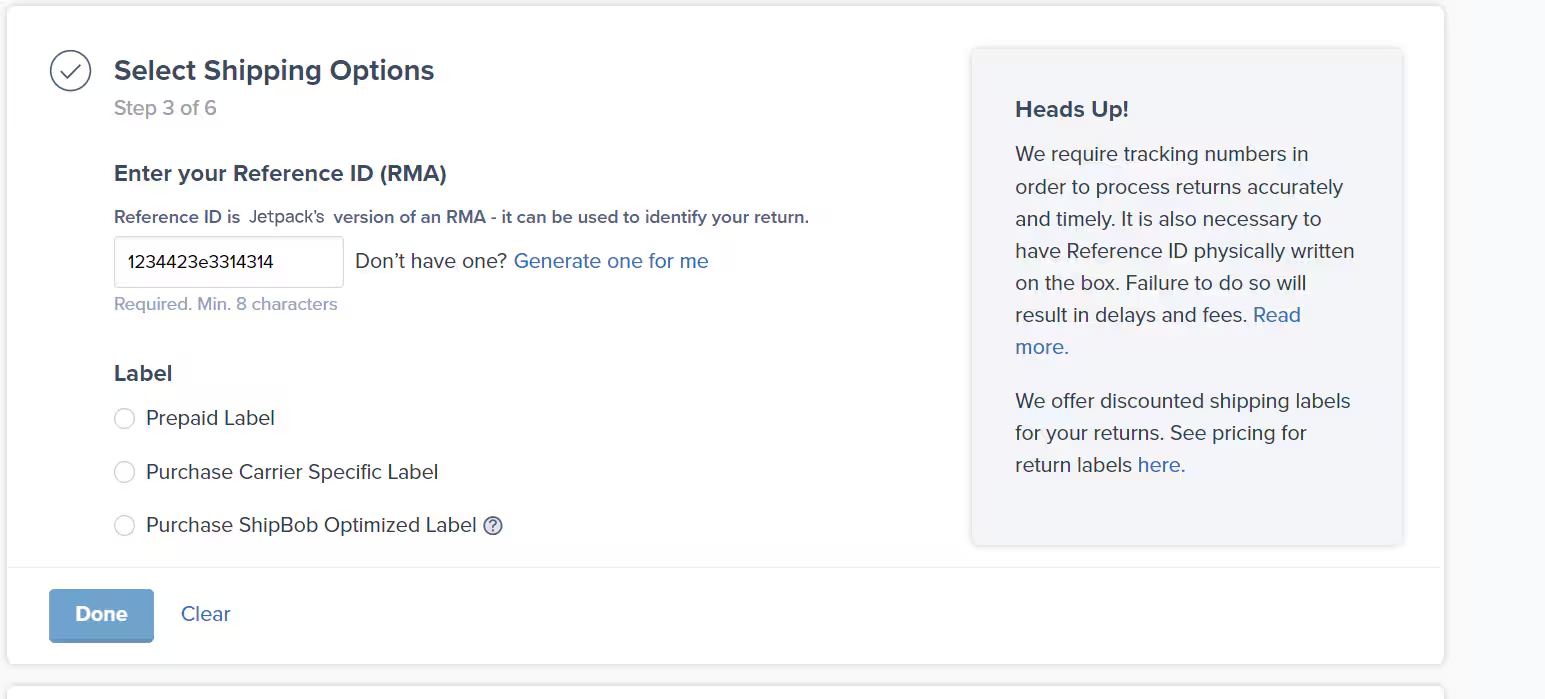
Return Order Guidelines
Follow these guidelines when creating return orders to ensure proper processing and avoid product disposal.| Guideline | What You Need to Know |
|---|---|
| Inventory ID | Always add the Inventory ID associated with the physical product being returned. For bundles, include the Inventory IDs of the individual products, not the bundle parent’s ID. |
| DG/Hazmat Products | Purchasing return labels for shipping back DG/hazmat products is not supported. If DG/hazmat products are returned, use the Prepaid Label option. |
| Lot Products |
|
| Return Orders per Package | Create one return order per package (e.g., each box, bubble mailer, or poly mailer) being returned. |
| Reference ID/RMA and Tracking | When sending returns, create a unique Reference ID or RMA and include a tracking number in the Jetpack dashboard. Important: This information must be physically printed on the external packaging to avoid product disposal. |
| Ship in Own Container (SIOC) Products |
|
Additional Considerations
When creating return orders, keep these important details in mind:- Country restrictions - Labels purchased through Jetpack can only be used for return orders within the same country.
- Heavy shipments - For returns over 10 pounds (up to 150 pounds or over 4.5 kilograms up to 68 kilograms), FedEx Ground is available as an option.
- Label errors - If an error occurs with the ShipBob Optimized Label option (e.g., due to limited carrier services, P.O. box returns, or military addresses), try the Carrier Specific Label option first, or select Prepaid Label if issues persist.
- DG/Hazmat limitations - For DG/Hazmat products, use the Prepaid Label option as Jetpack does not support ShipBob-purchased labels for these items.
Let’s Dive Deeper
Our Approach to Returns
Understand the complete returns process and workflow
Setting Returns Preferences
Configure return and RTS actions for each product
Tracking Return Orders
Track and manage returns as they arrive at fulfillment centers
Restocking Your Products
Understand how returned products are restocked
Setting Product Preferences
Configure all product-level settings including returns
Creating + Managing Lot Products
Special handling for lot-tracked returns

Questions? Contact Jetpack Care.
If you have any questions or run into issues, you can always contact Jetpack Care for help. Our team is always here to assist via Slack, phone, or email!