Packing slips inform Jetpack’s Operations team of essential order information, such as required products, quantities, and customer details. Customizing your packing slips allows you to brand the customer experience, control what information appears, and tailor the presentation for B2C or B2B shipments.
What’s Included on Packing Slips
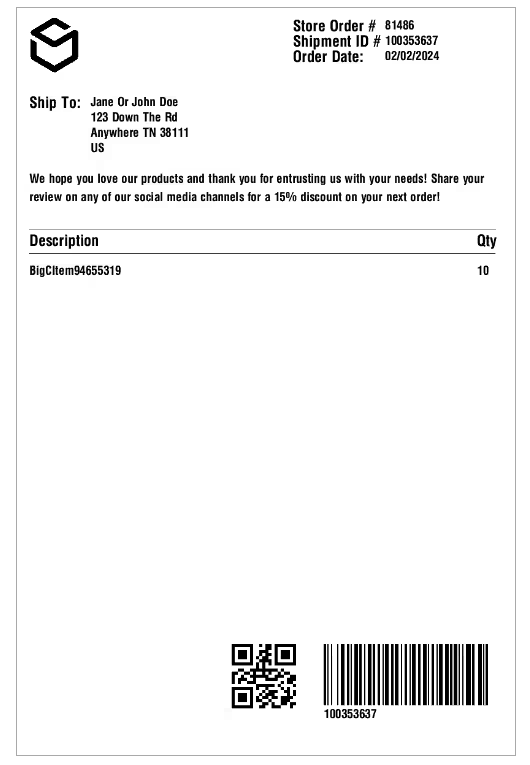
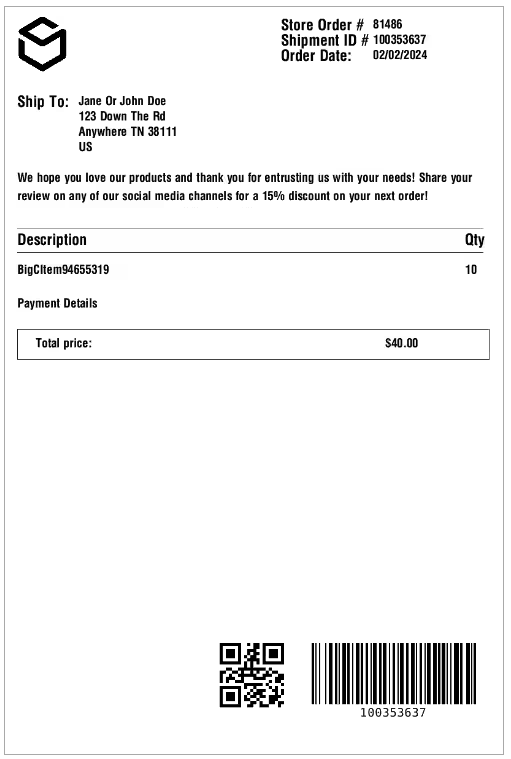
Jetpack’s packing slips contain the following components:| Element | Description | Notes |
|---|---|---|
| Date | The date when the order was imported or created in the Jetpack dashboard |
|
| Store Order # | The order number from your ecommerce platform or online store |
|
| Shipment ID | A unique identifier generated by Jetpack for each order |
|
| Company Logo | Defaults to Jetpack’s logo (can be replaced with your brand logo) |
|
| Bin Location | An internal identifier indicating where the item was stored and picked within the fulfillment center |
|
| Item | The product name, as listed in your Jetpack dashboard |
|
| Quantity | The number of product units picked for shipment |
|
| Payment Details | The total price paid by the customer, displayed in the accepted local currency |
|
| Shipping Details | The recipient’s shipping address |
|
Accessing Packing Slip Settings
To customize your packing slip settings: From the Jetpack dashboard: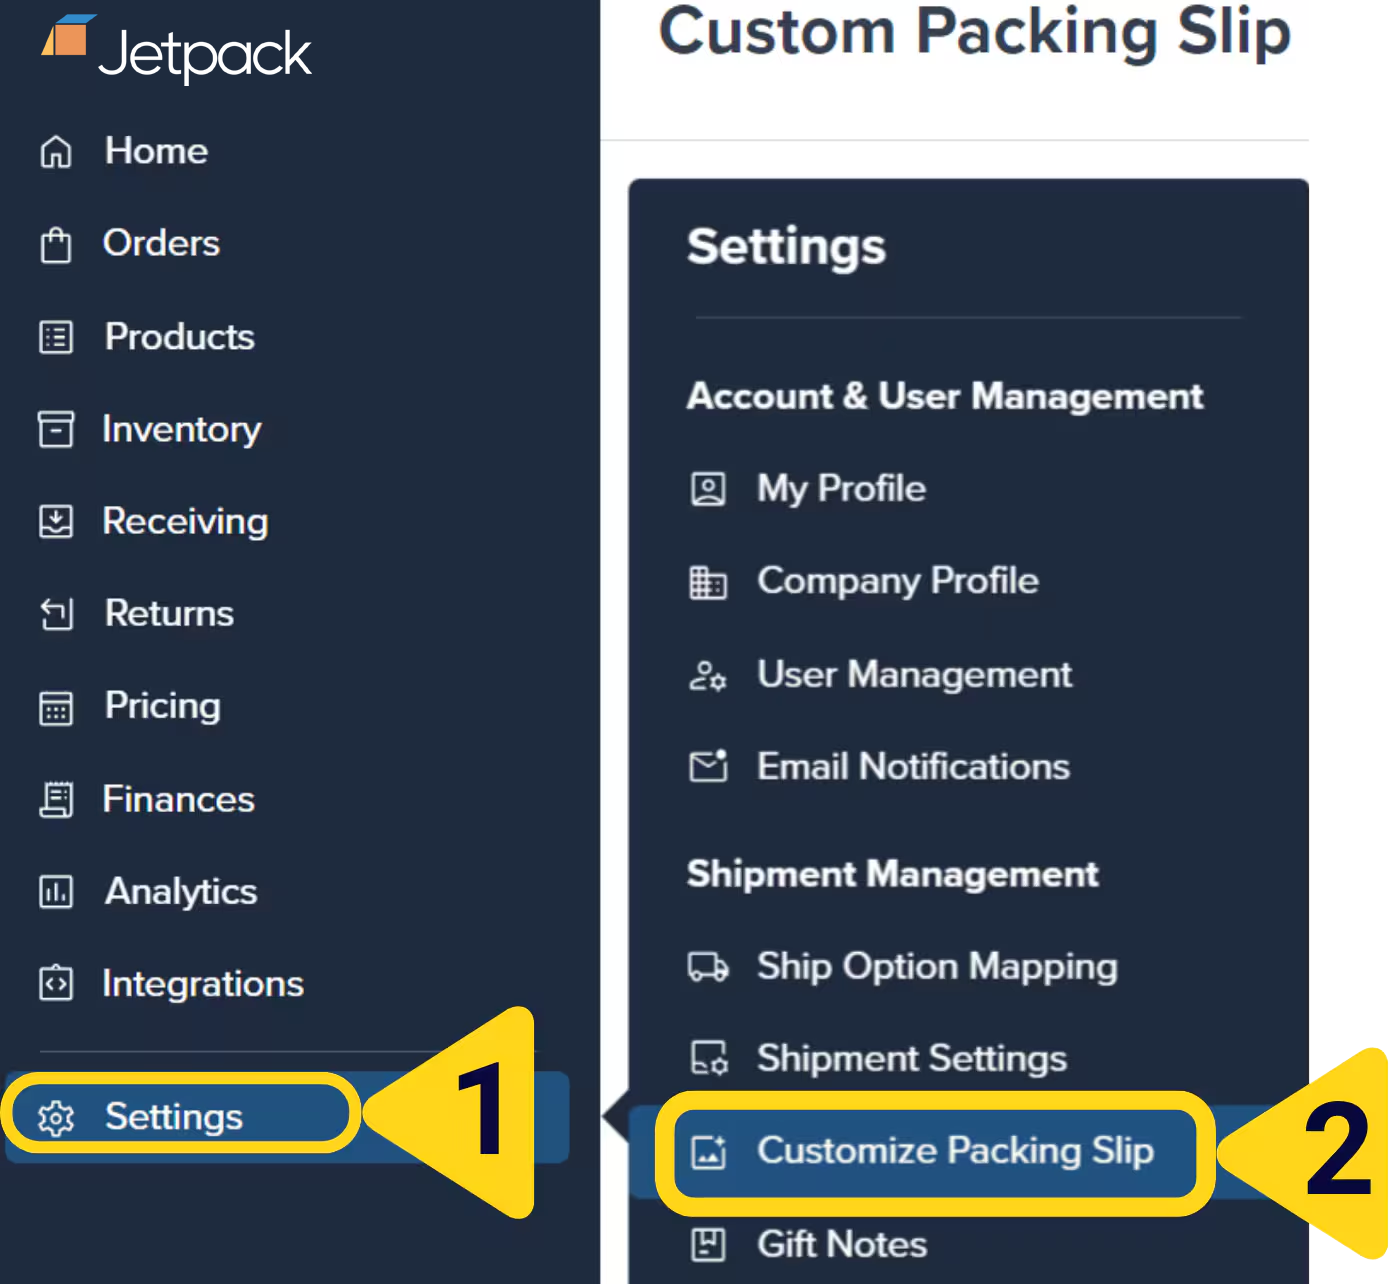
Enabling/Disabling B2C Packing Slips
You can prevent packing slips from being printed for B2C (Direct-to-Consumer) orders. This setting doesn’t impact B2B or retail dropship packing slips. When to disable B2C packing slips:- You prefer a minimalist unboxing experience
- Your products don’t require itemized lists for customers
- You want to reduce paper waste for consumer orders
- For B2B orders needing packing slips, add a note within the Jetpack dashboard
- Inclusion of packing slips in B2C orders isn’t guaranteed by default (depends on warehouse operations)
- B2B and retail dropship orders will still receive packing slips regardless of this setting

Enabling SKU-Level Pricing for Packing Slips
SKU-level pricing allows the price per unit to be displayed on the order’s packing slip. This price includes any discounts. The information displayed under the Discount Per Unit and Price Per Unit columns will be based on the order information provided by your integration (e.g., Shopify or WooCommerce). When to enable SKU-level pricing:- B2B orders where the customer needs itemized pricing
- Wholesale orders for accounting and verification
- Retail dropship where the retailer needs pricing details
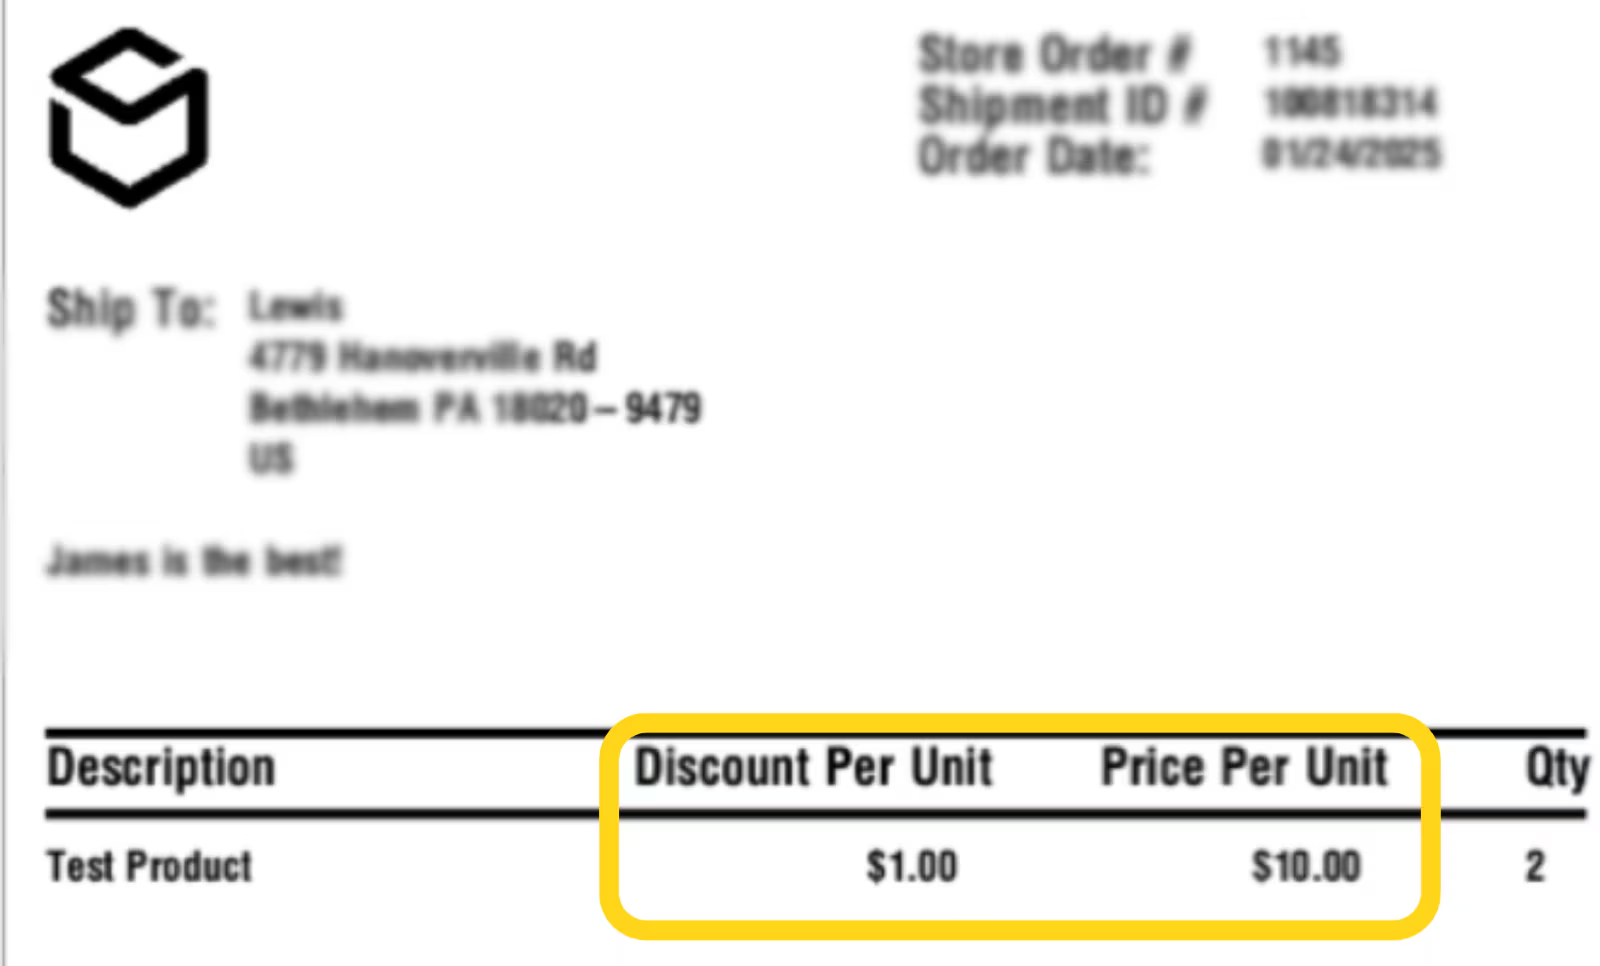
Click the toggle icon to the right according to your choice
- To enable SKU Level Pricing (allowing pricing and discounts to appear), change the toggle to Yes
- To disable SKU Level Pricing (preventing pricing and discounts from appearing), change the toggle to No
SKU-level pricing requires that your ecommerce integration passes pricing information to Jetpack. If pricing doesn’t appear after enabling this setting, verify your integration configuration or contact Jetpack Care.
Removing Payment Details from Packing Slips
Activating this option removes payment information from all packing slips. This is useful when:- Shipping gift orders where you don’t want the recipient to see pricing
- Maintaining price confidentiality for wholesale or B2B orders
- Simplifying the packing slip appearance
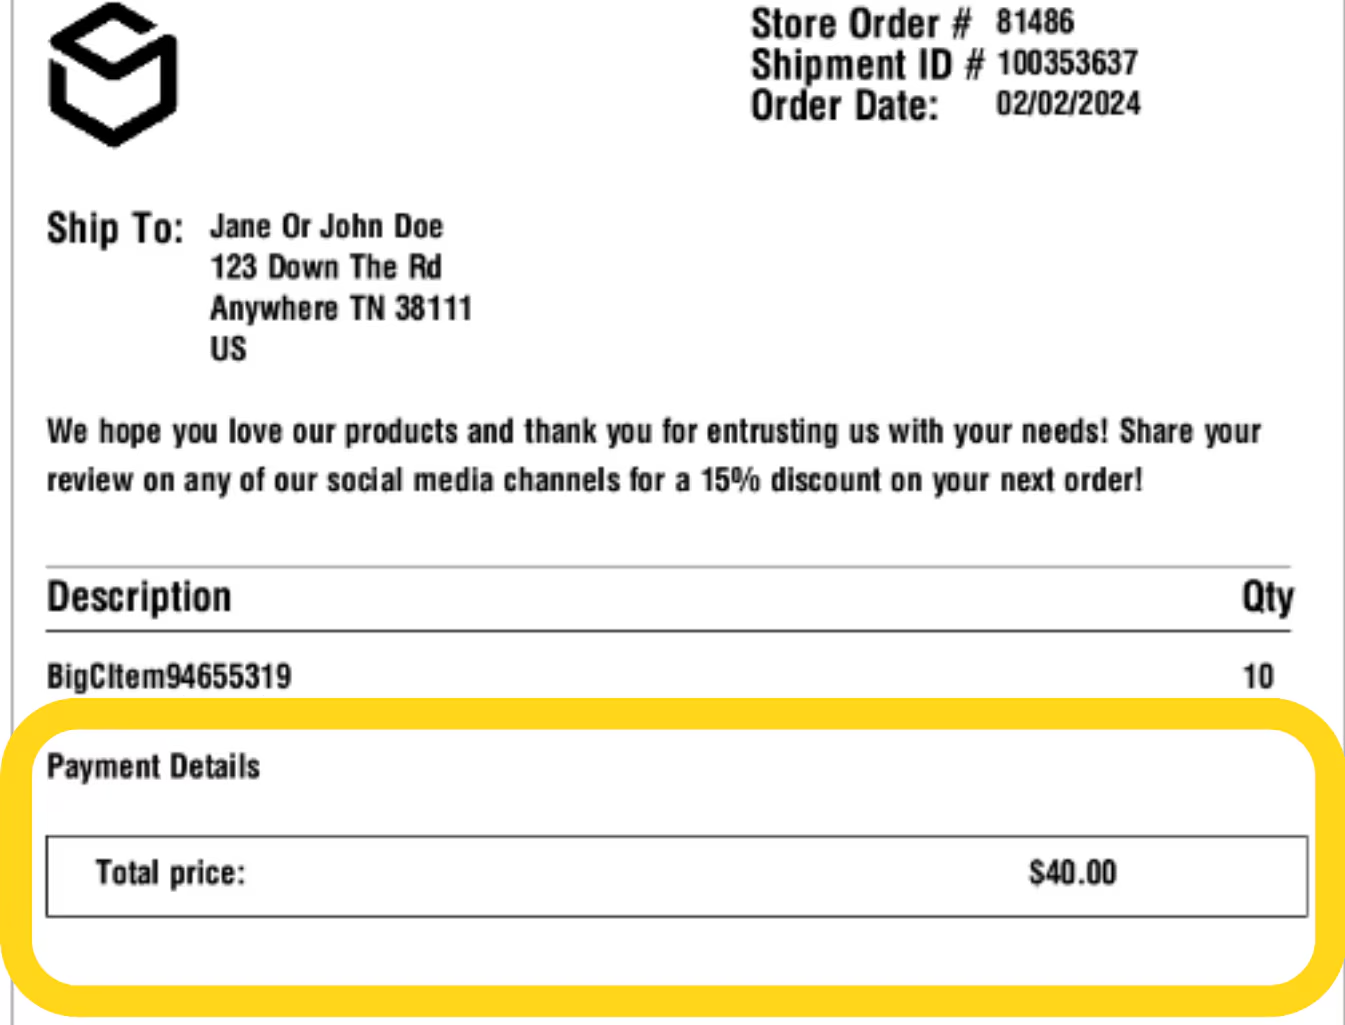
When payment details are removed, your packing slip will no longer display:
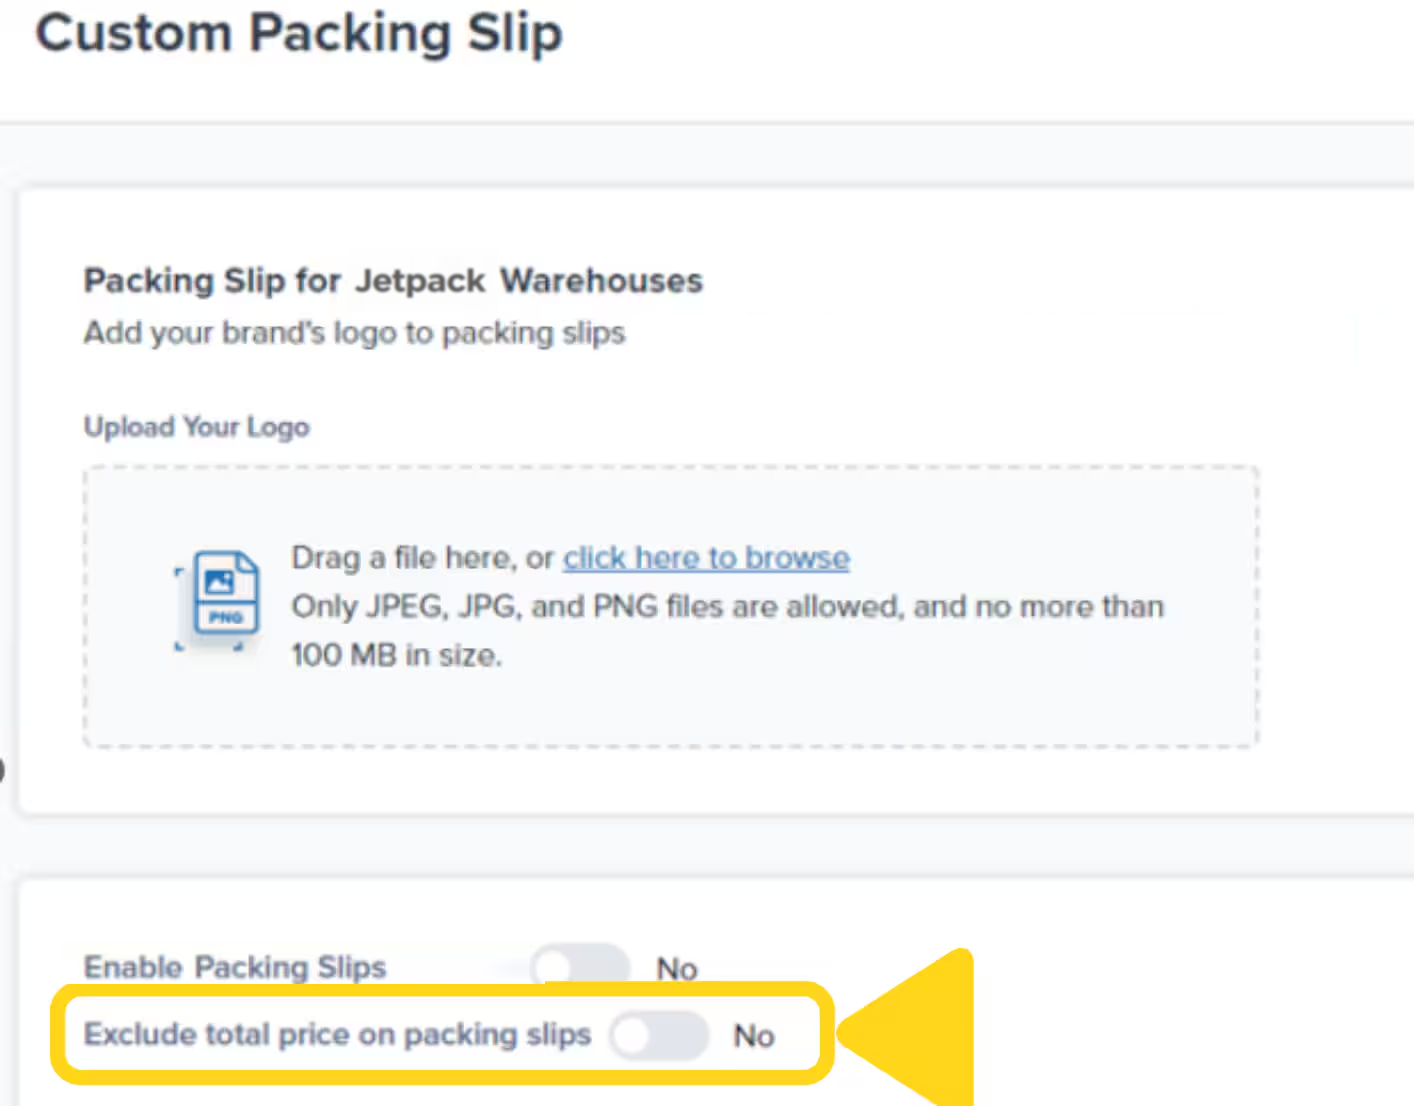
- Order total
- SKU-level pricing (even if SKU-level pricing is enabled)
- Discount information
Updating Your Packing Slip Logo
Customize your packing slips by uploading your logo under the Packing Slip Logo tab. Your logo should follow the guidelines below: Logo Requirements:| Specification | Requirement |
|---|---|
| Format | Black-and-white monochrome PNG image |
| Dimensions | Square dimensions, ideally 100 x 100 pixels |
| File Size | 499 KB or smaller |
| Resizing | Logo auto-resizes for proper fit |
To view or delete your logo:
- View uploaded logo - Click the file icon
- Delete logo - Click the trash can icon
Adding a Standard Message to Packing Slips
By default, packing slips include no custom messages. You can add a personalized message to appear under the Ship To section on all packing slips. Common uses for standard messages:- “Thank you for your order!”
- “Questions? Contact us at support@yourbrand.com”
- “Follow us on Instagram @yourbrand”
- “Please recycle this packing slip”
- Custom return instructions or warranty information
The message will appear on all future packing slips under the Ship To section.
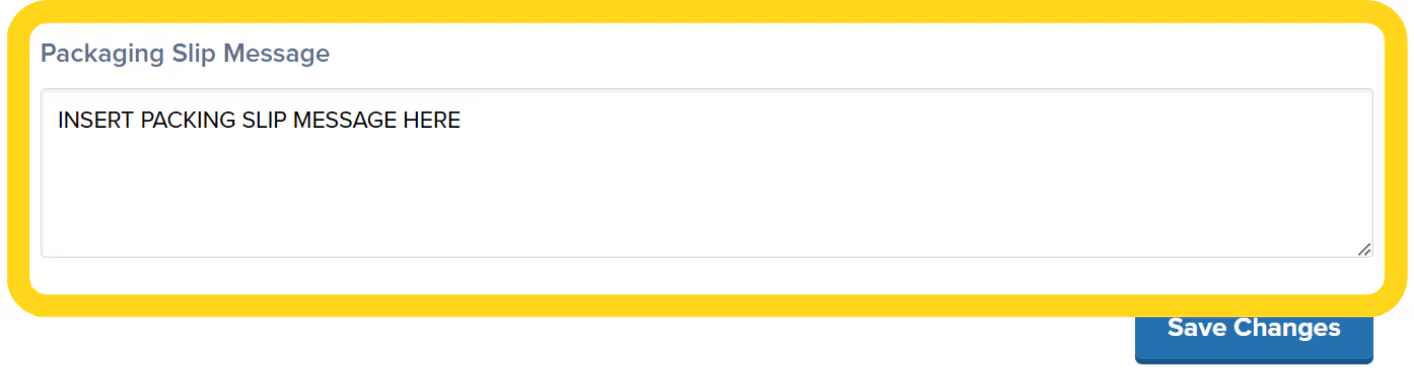
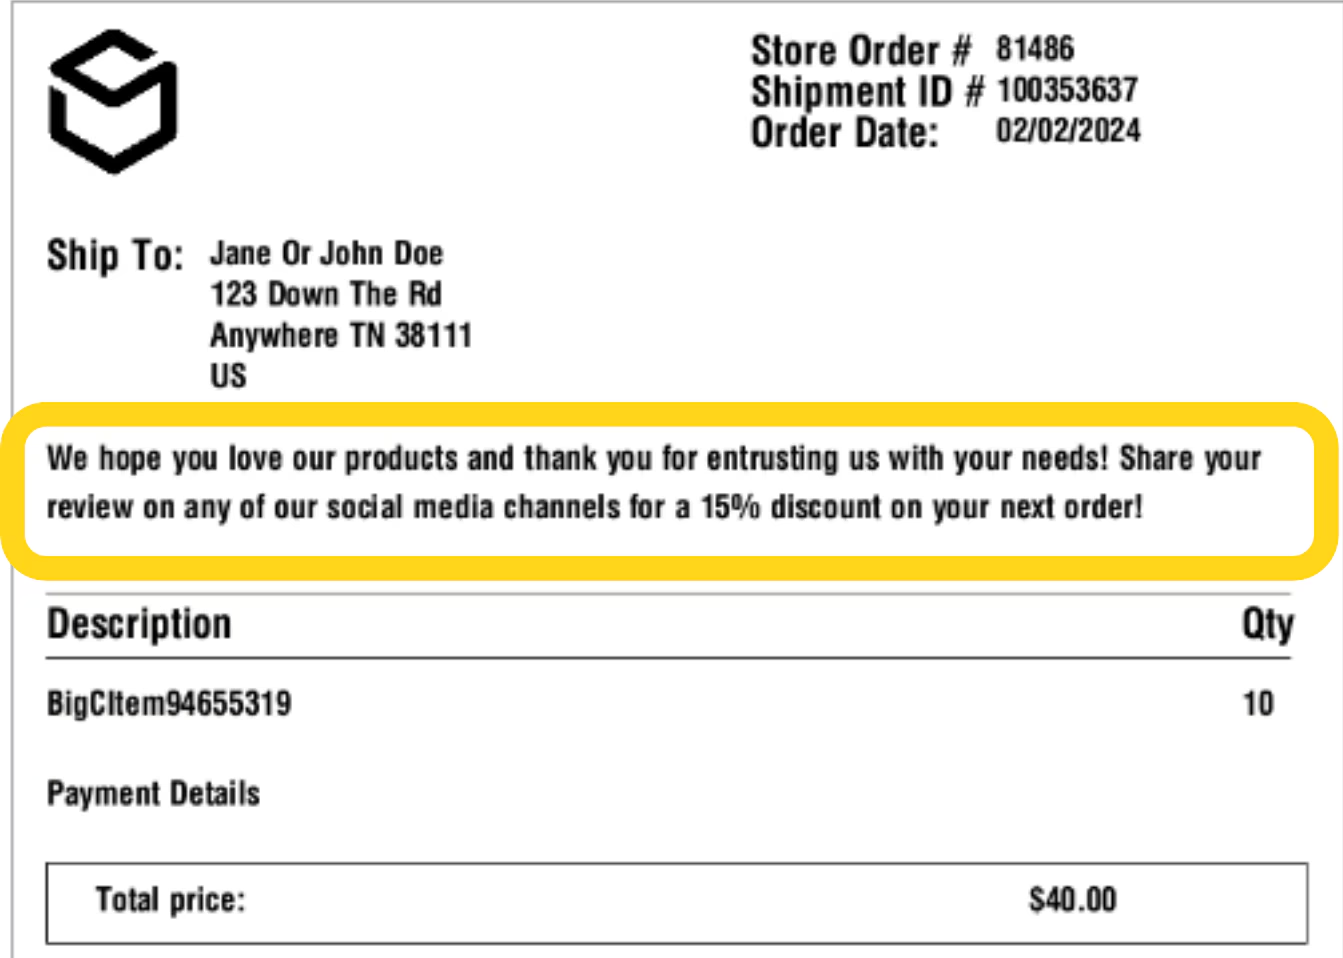
Packing slip messages are limited to 200 characters. Keep your message concise and actionable for the best customer experience.
Let’s Dive Deeper
Shipping Preferences Overview
Back to the main shipping preferences guide
Gift Notes
Add personalized gift messages to orders
Packaging Preferences
Configure packaging options and materials
Company Profile Settings
Set up your custom sender label for shipping labels
Custom Sender Labels
Customize sender information on packages
Marketing Inserts
Include promotional materials in shipments

Questions? Contact Jetpack Care.
If you have any questions or run into issues, you can always contact Jetpack Care for help. Our team is always here to assist via Slack, phone, or email!