Enabling gift notes in your Jetpack account allows any order that contains a gift message to receive a printout of the unique message. This feature enhances the customer experience by adding a personal touch to gift shipments and helps differentiate your brand through customized messaging.
How Gift Notes Work
When gift notes are enabled, Jetpack automatically prints and includes personalized gift messages with shipments:- Customer adds gift message at checkout (via your ecommerce platform)
- Message syncs to Jetpack through your store integration
- Jetpack prints the message on thermal paper with your logo (if uploaded)
- Gift note is included in the package before sealing
Gift Note Features and Specifications
Display and Printing:- Gift notes are printed in black and white on Jetpack’s 4” x 6” thermal paper
- Each note can display up to 500 characters, including special characters
- The font used is Zebra Font 0, which cannot be changed
- If you upload your brand logo in the Gift Notes section, it will appear on the note
- Gift notes are excluded from orders that contain inventory with packaging requirements set to Ship in Own Container (SIOC)
- Inclusion of gift notes in B2C orders isn’t guaranteed by default (depends on warehouse operations)
- Gift messages can be edited or deleted on the Order Details page up until the order is picked
- After picking, the fulfillment process has begun, and changes are no longer possible
Gift Note Pricing
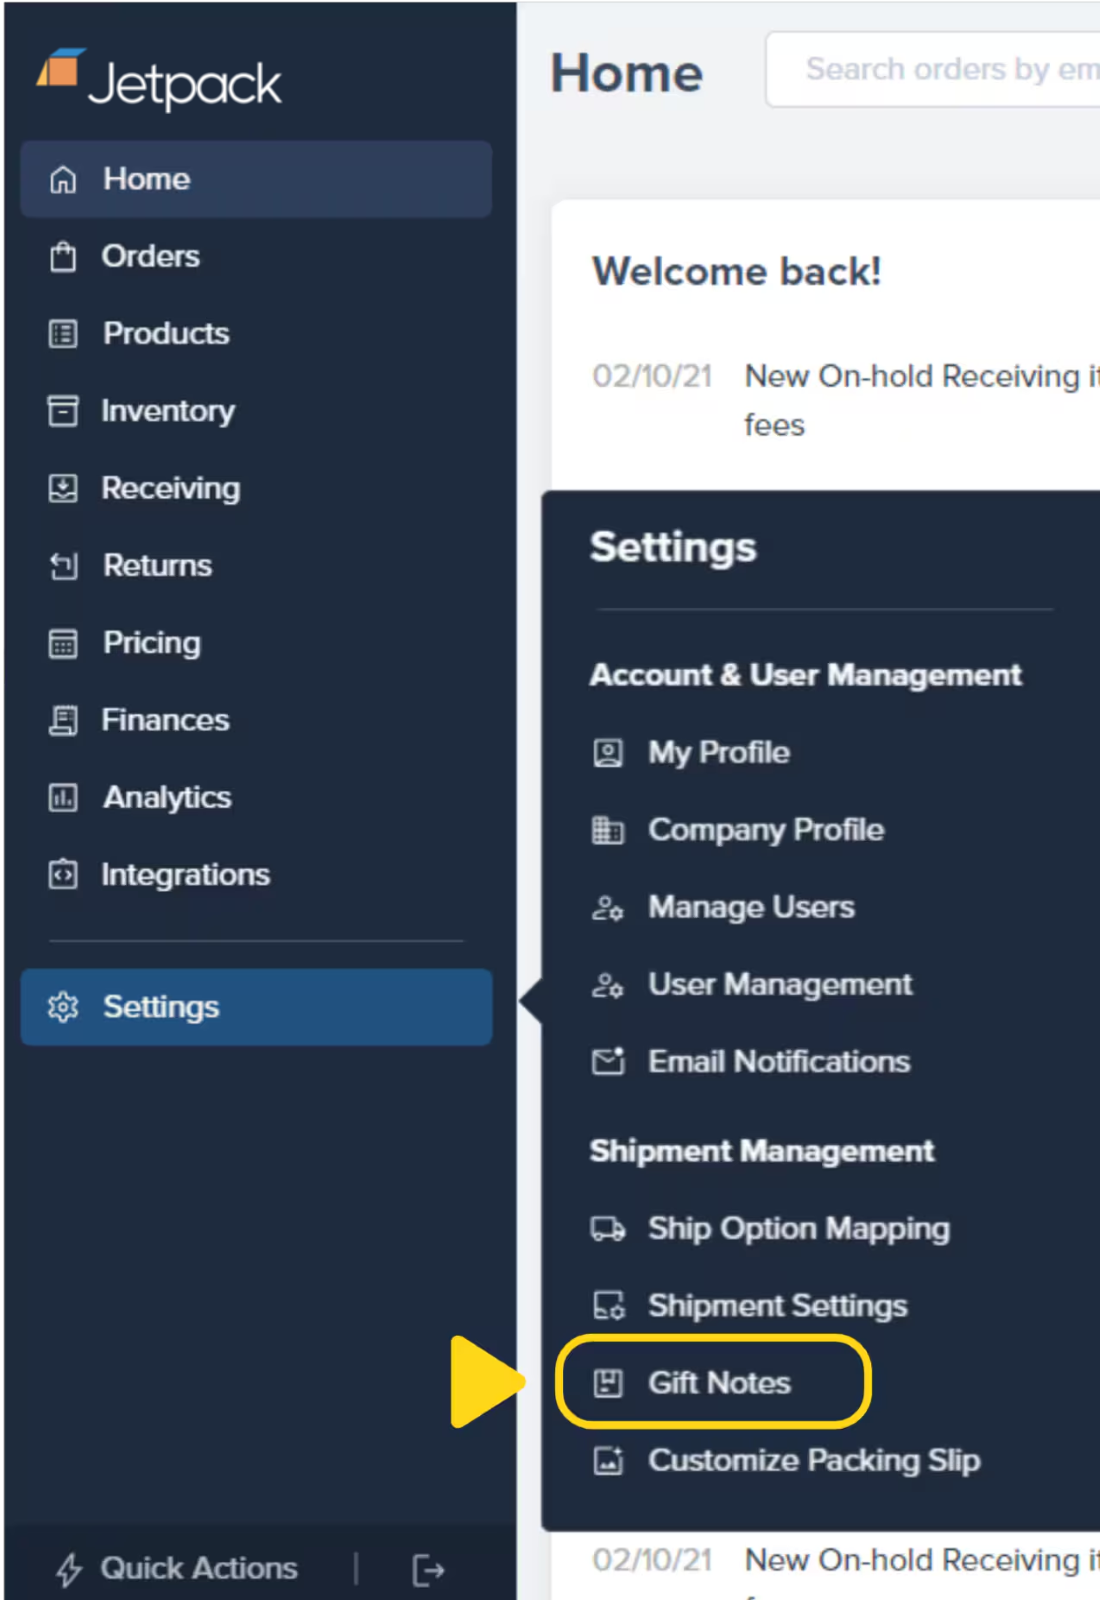
Including gift notes incurs an additional fee per order. Pricing details vary based on your fulfillment plan and order volume. For information about gift note pricing, see General Pricing.Enabling Gift Notes in the Jetpack Dashboard
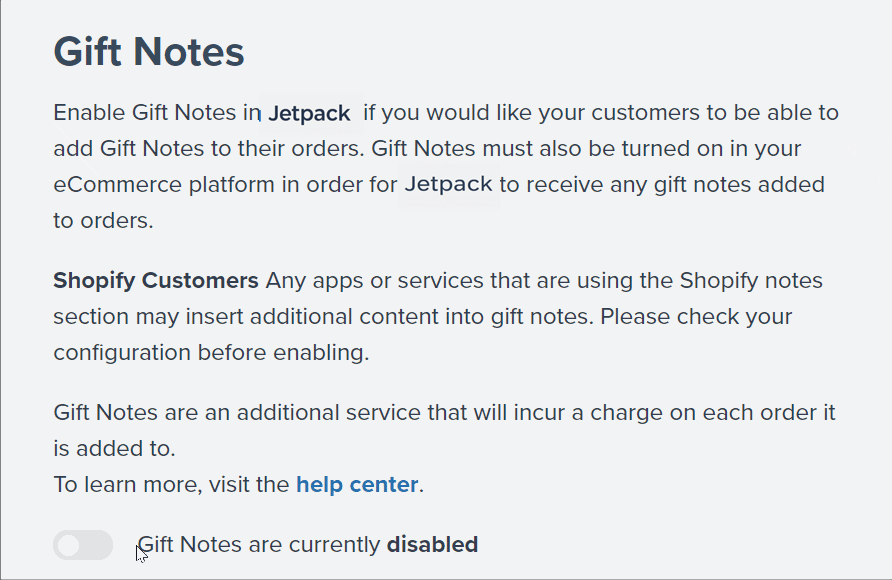
To enable gift note functionality for your account: From the Jetpack dashboard:
Gift notes are now enabled for your account. Orders with gift messages will automatically include printed gift notes.
Enable gift notes before your peak gift-giving seasons (holidays, Mother’s Day, Valentine’s Day) to ensure the feature is active when customers need it most.
Adding Gift Notes to Orders
Gift messages can be added in three ways:1. Automatically via Ecommerce Integrations
The most common method—gift messages added to orders in your ecommerce platform automatically sync to Jetpack: Shopify:- Customize the order’s Notes field in your Shopify store
- Gift messages are processed automatically when gift notes are enabled in Jetpack
- Include a gift message on the product page by labeling the custom field as “Gift Message”
- WooCommerce syncs the message to Jetpack during order import
- Gift messages added to the Gift Note field in ShipStation will be saved in Jetpack
- Ensure ShipStation integration is properly configured
- Consult the ShipBob API documentation to add gift messages programmatically
- Use the
gift_messagefield in your order creation requests
Each ecommerce platform handles gift messages differently. Consult your platform’s documentation to ensure gift message fields are properly configured and mapped to Jetpack.
2. Manually via the Order Details Page
You can add or edit gift messages for individual orders directly in the Jetpack dashboard: From the Jetpack dashboard: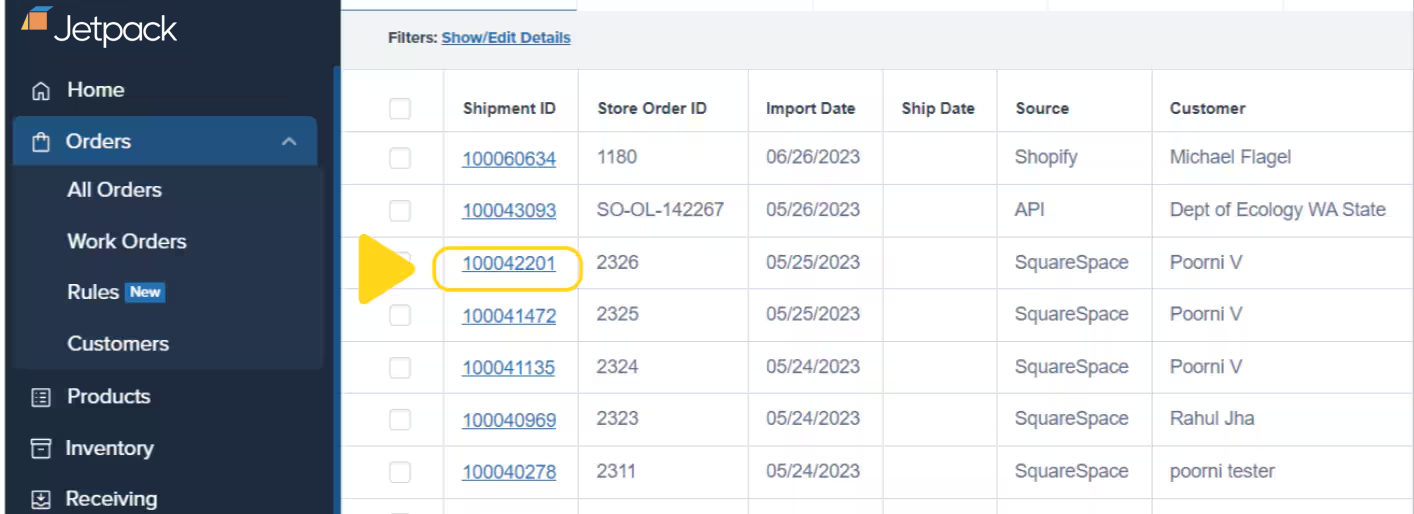

Insert your gift message into the text box
The message has a 500-character limit. To remove a message, click Delete Gift Note.
3. Bulk Import via Excel
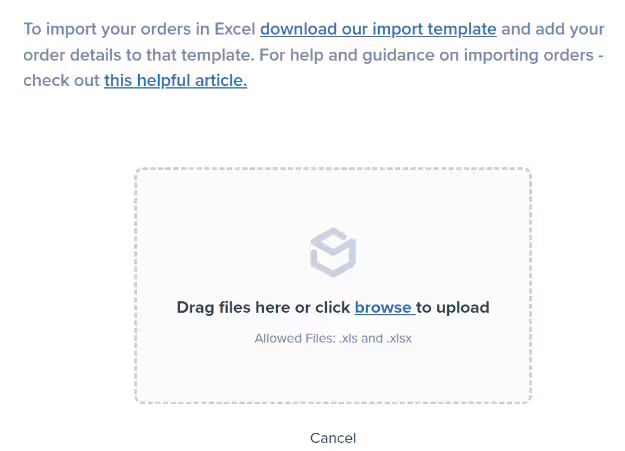
You can add gift messages to multiple orders at once using Excel order imports: To bulk import gift messages:- Download the order import template provided in the Jetpack dashboard
- Follow the instructions on the Excel file
- Add the gift message under the GiftMessage column for each order
- Important: Do not alter formatting or delete cells
Verify the order count
The screen will refresh, showing the total number of orders identified. Ensure the counts match.
Uploading a Gift Note Logo
Customize your gift notes by uploading your brand logo. Your logo will appear at the top of every gift note, reinforcing your brand identity. Logo Requirements:| Specification | Requirement |
|---|---|
| Format | Black-and-white monochrome PNG image |
| Dimensions | Square dimensions, ideally 100 x 100 pixels |
| File Size | 499 KB or smaller |
| Resizing | Logo auto-resizes to fit horizontally on the gift note |
To view or delete your logo:
- View - Click the file icon to see your uploaded logo
- Delete - Click the trash can icon to remove the logo
Let’s Dive Deeper
Shipping Preferences Overview
Back to the main shipping preferences guide
Customizing Packing Slips
Brand your packing slips
Packaging Preferences
Configure packaging options
General Pricing
Understand gift note fees
Marketing Inserts
Include promotional materials in shipments
Custom Sender Labels
Customize sender information on packages

Questions? Contact Jetpack Care.
If you have any questions or run into issues, you can always contact Jetpack Care for help. Our team is always here to assist via Slack, phone, or email!