
Prerequisites
Before connecting BigCommerce to Jetpack, ensure you have:- Active BigCommerce store with admin access
- Jetpack merchant account with login credentials
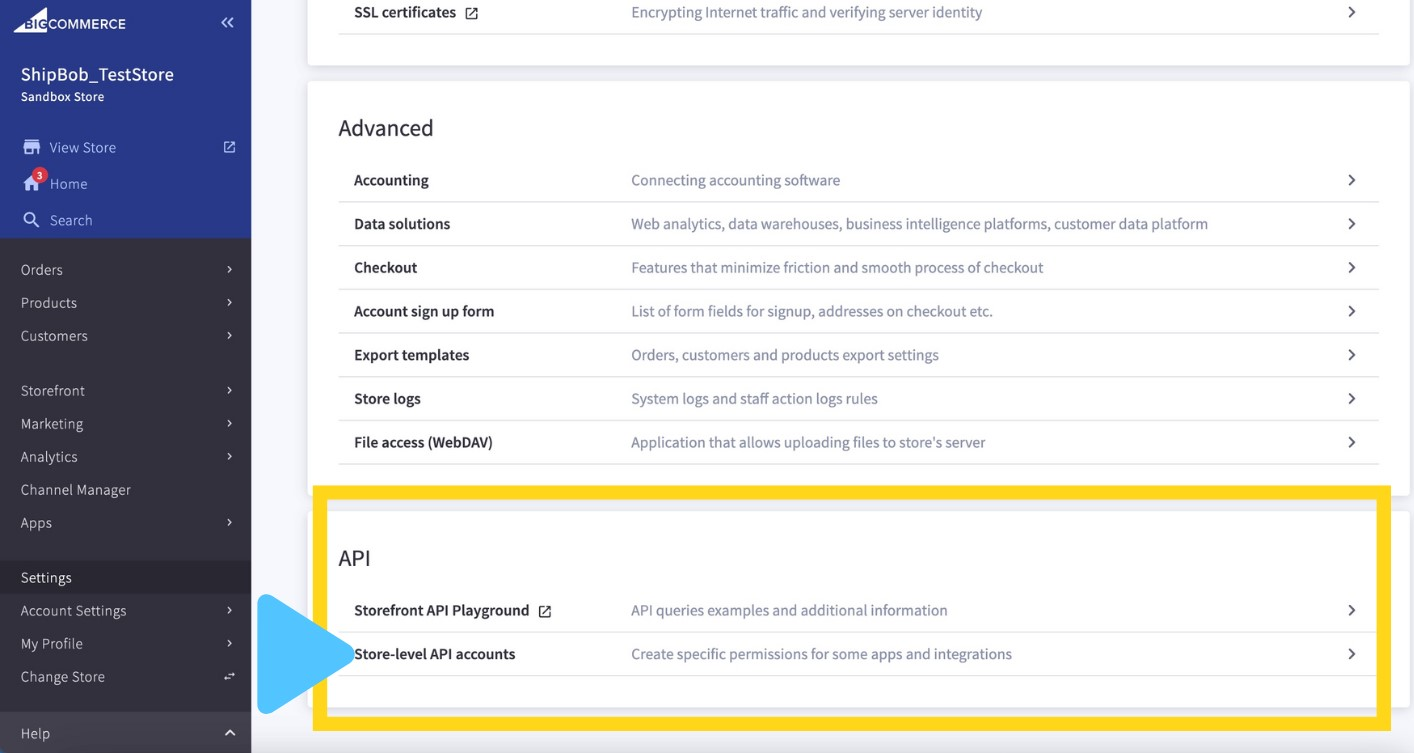
Retrieving API Credentials from BigCommerce
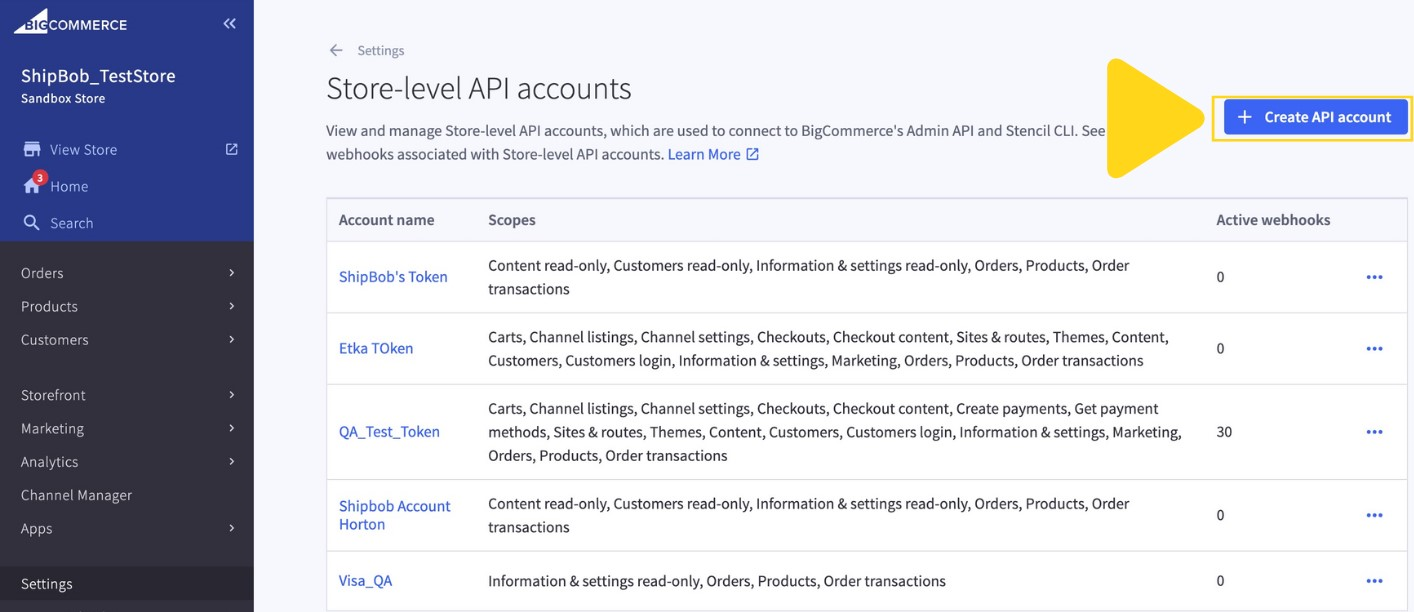
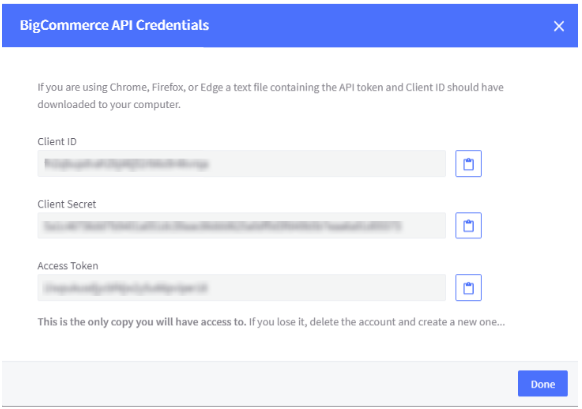
Before connecting BigCommerce to Jetpack, you need to create API credentials in your BigCommerce store. These credentials allow Jetpack to securely access your store’s data.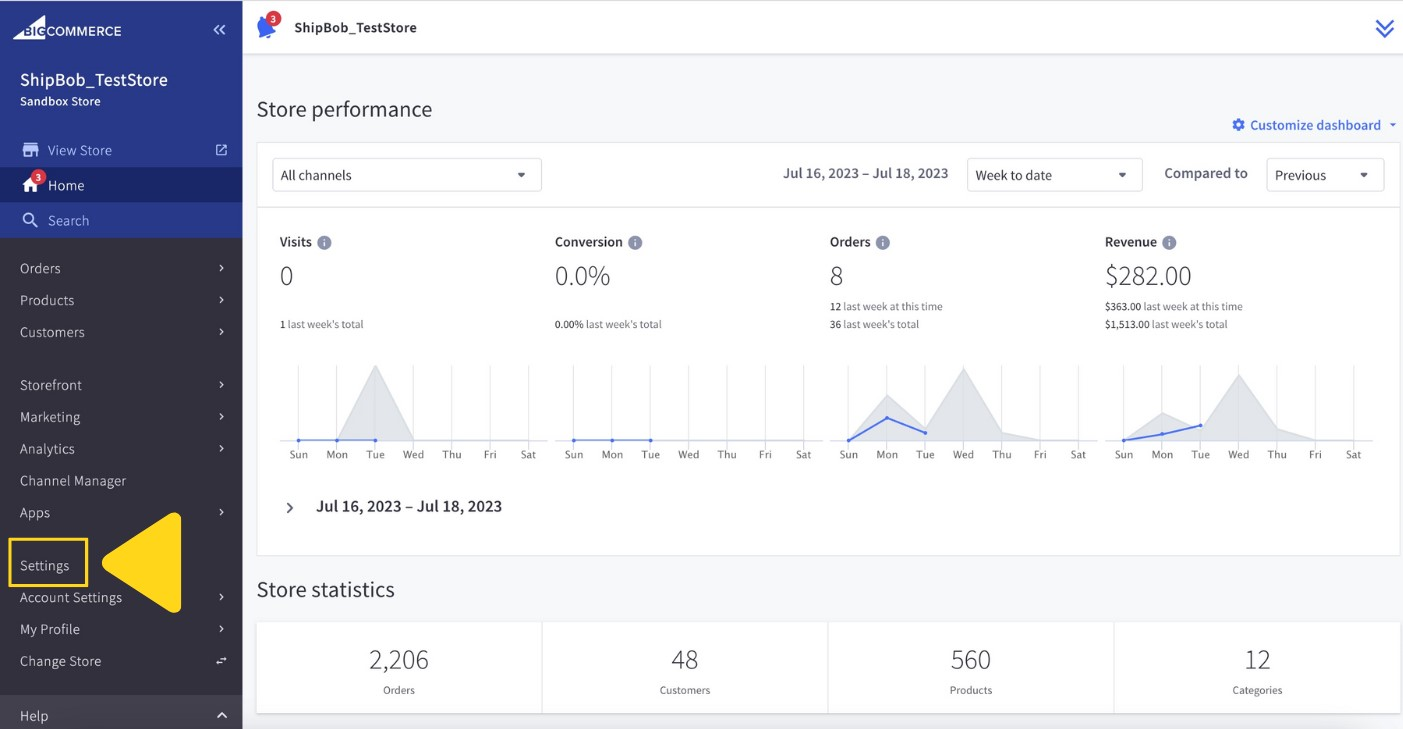
Enter a descriptive name in the Name field
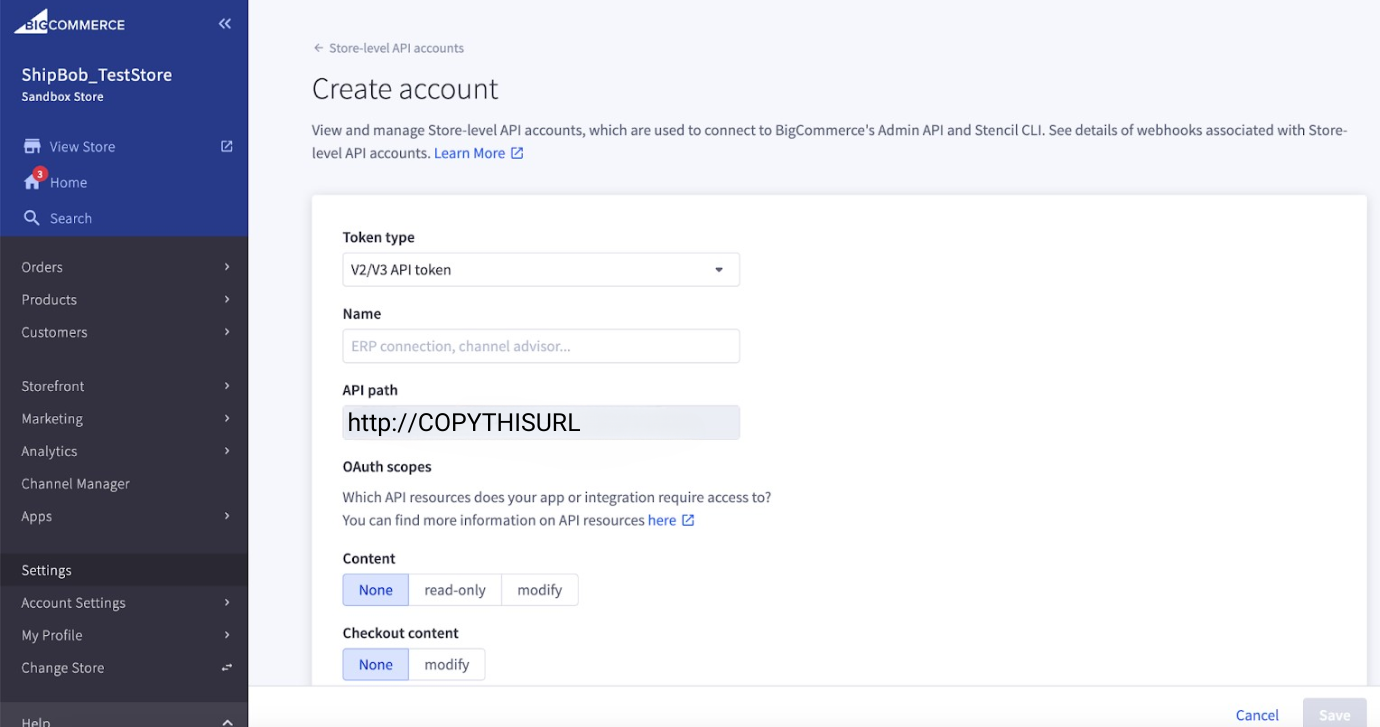
Configure the permissions settings
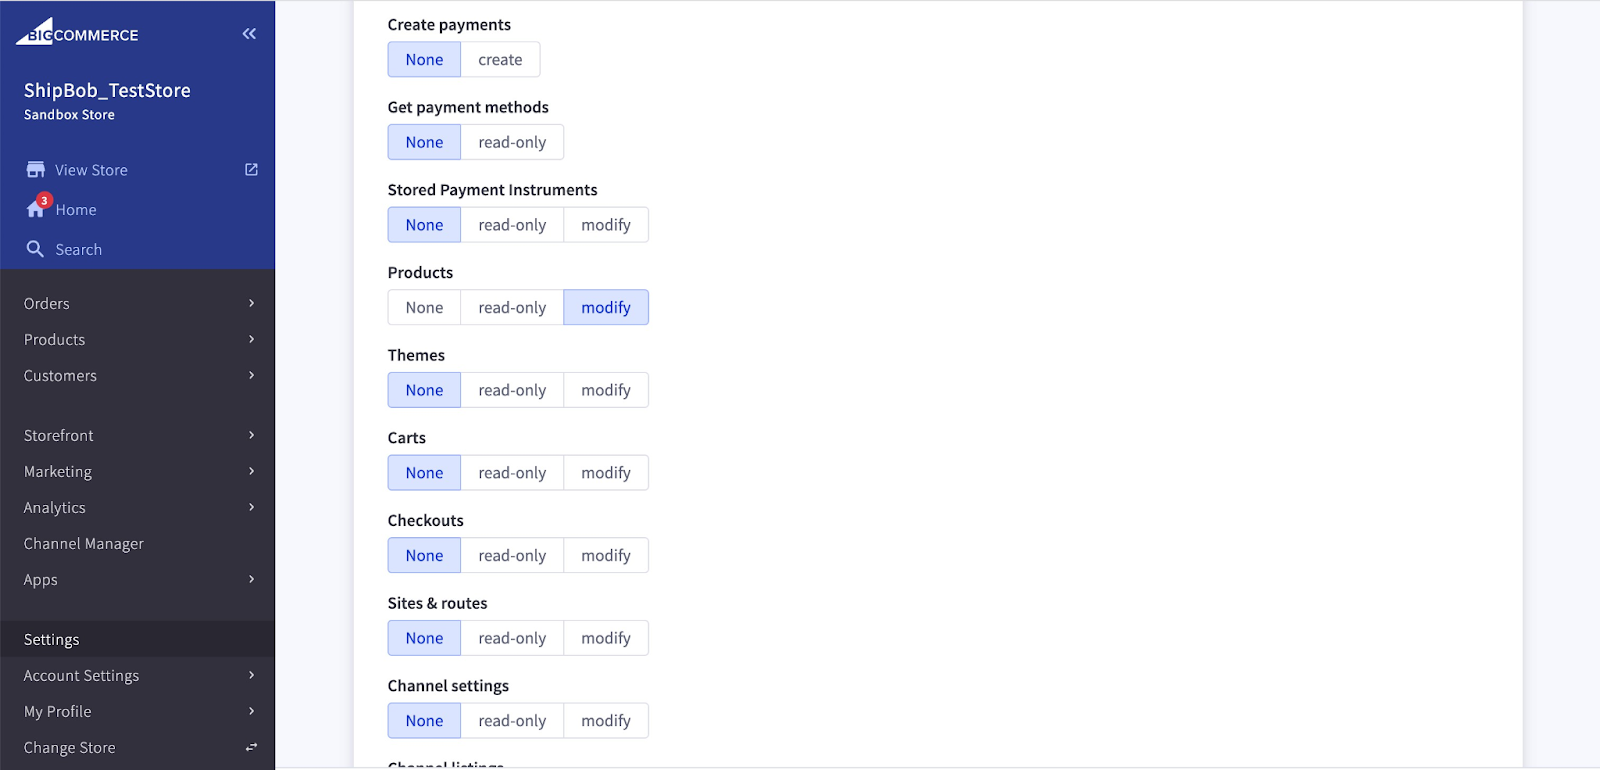
- Content: read-only
- Checkout content: None
- Customers: read-only
- Customers login: None
- Information & settings: read-only
- Marketing: None
- Orders: modify
- Order transactions: modify
- Products: modify
- Store Inventory: modify
- Fulfillment Methods: modify
- Order Fulfillment: modify
- All other settings: None
Linking BigCommerce to Jetpack
Once you have your API credentials from BigCommerce, you can link your store to Jetpack.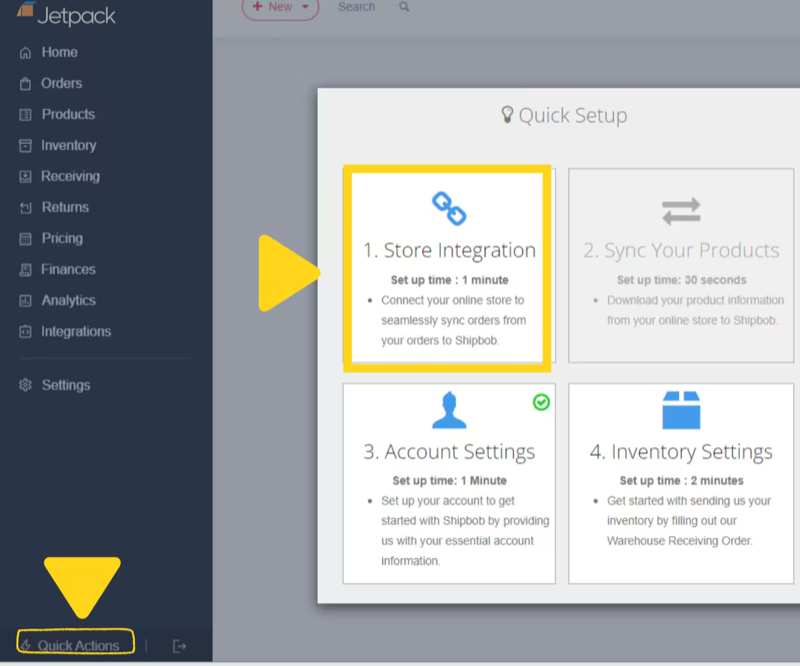
Enter your API credentials
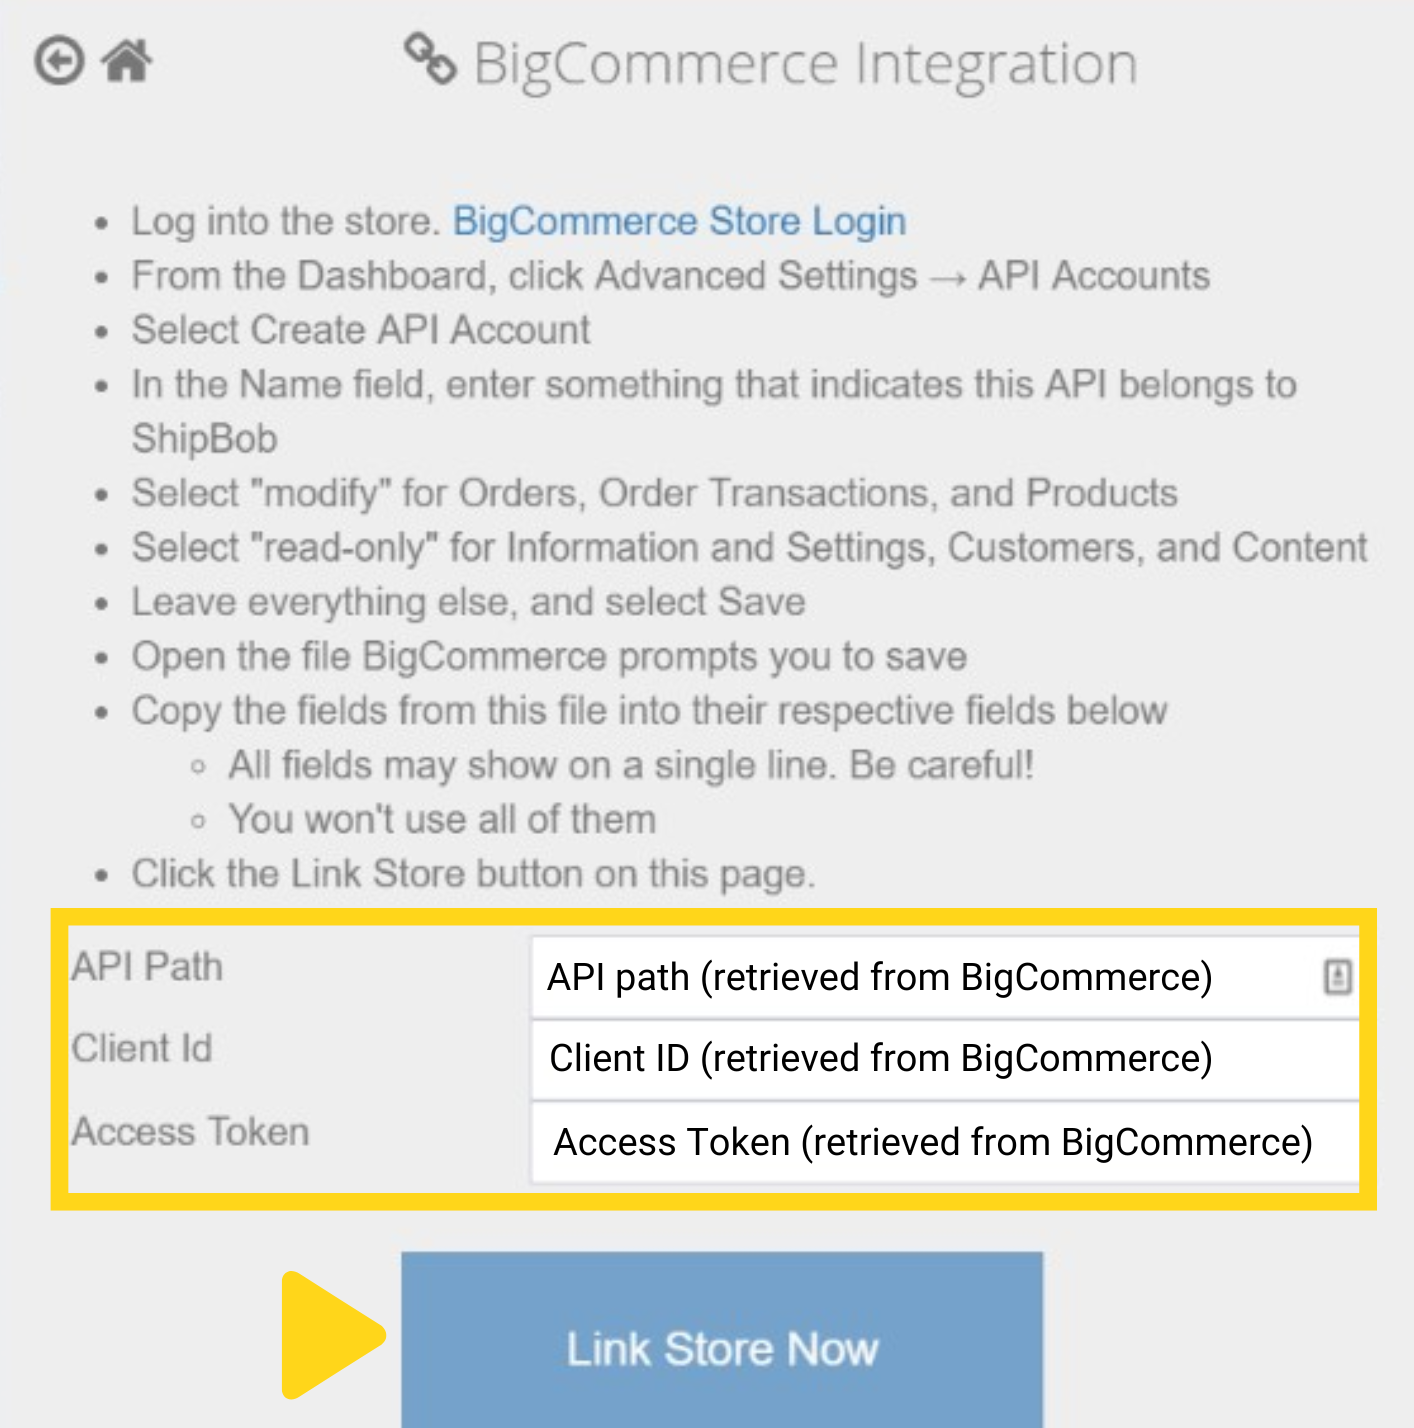
- API Path (retrieved from BigCommerce)
- Client ID (retrieved from BigCommerce)
- Access Token (retrieved from BigCommerce)
Syncing Products
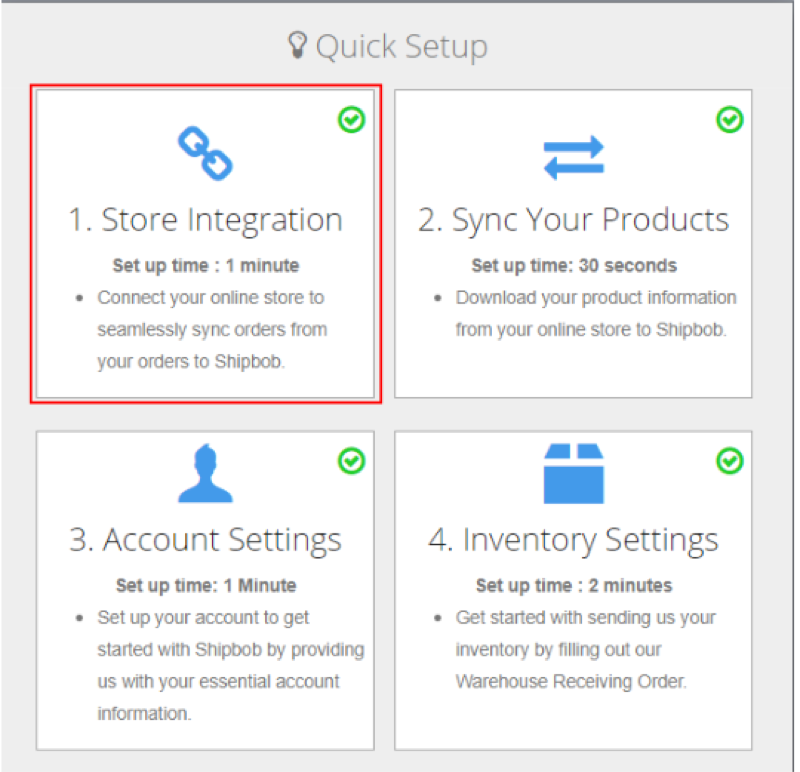
BigCommerce products can be synced to Jetpack during initial setup or at any time using the Quick Setup option.How Product Syncing Works
- Unique Identifier: Jetpack uses the SKU from BigCommerce as the unique identifier for syncing products. If no SKU is provided, the automatically generated product ID from BigCommerce is used.
- Product Variants: In BigCommerce, product variants (e.g., different sizes or colors) are optional. Jetpack will import each variant as a unique product with its own Inventory ID.
- Product Images: When products are synced, their images from BigCommerce are automatically imported to Jetpack. Any changes to product images in BigCommerce will update in the Jetpack dashboard.
Enabling Automatic Order Import
Jetpack can automatically import orders from BigCommerce every 30 minutes, or you can import orders manually as needed.Setting Up Automatic Order Import
Navigate to Account Settings in your Jetpack dashboard
Enable Fetch Orders for your BigCommerce store
Set the Start Shipping Date
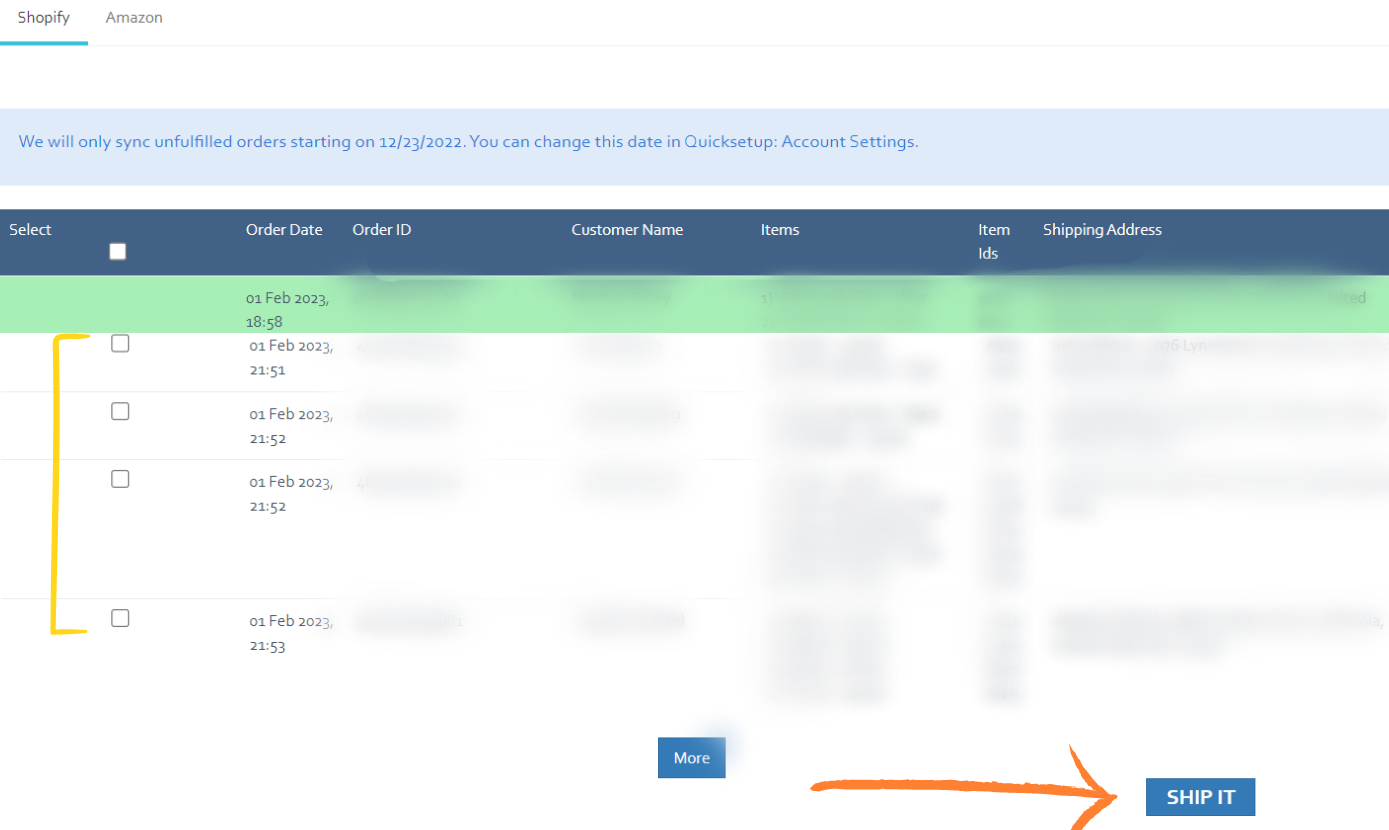
Manually Importing Orders
You can also import orders manually from your BigCommerce store: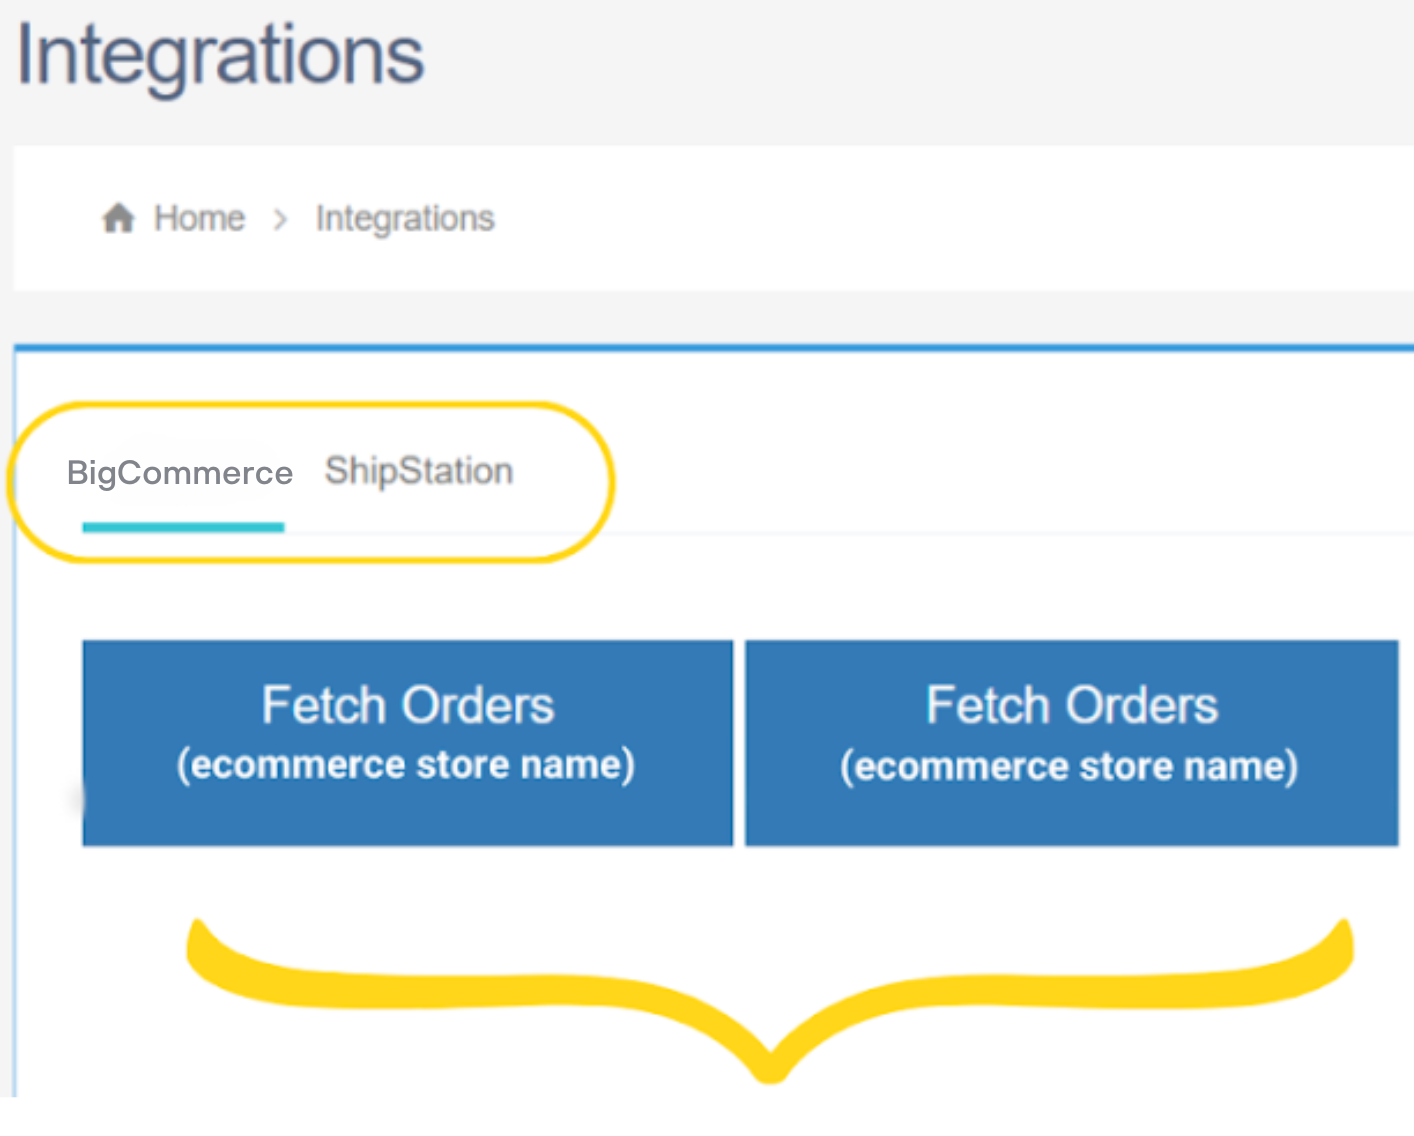
Enabling Inventory Sync
Jetpack can automatically update inventory levels back to BigCommerce every 15 minutes. You need to enable inventory tracking in BigCommerce first, then enable the sync in Jetpack.Enabling Inventory Tracking in BigCommerce
Log in to your BigCommerce account and go to Products
Click the Inventory tab
Enabling Inventory Sync in Jetpack
Navigate to Account Settings in your Jetpack dashboard
Enable Inventory QTY Sync for your BigCommerce store
How Inventory Sync Works
Jetpack automatically updates inventory levels for both bundles and non-bundles to BigCommerce every 15 minutes:- For non-bundled products: The sellable quantity is calculated as Fulfillable Quantity minus Exception Quantity.
- For bundled products: The sync uses the product within the bundle that has the least available units to determine the total number of bundles that can be fulfilled.
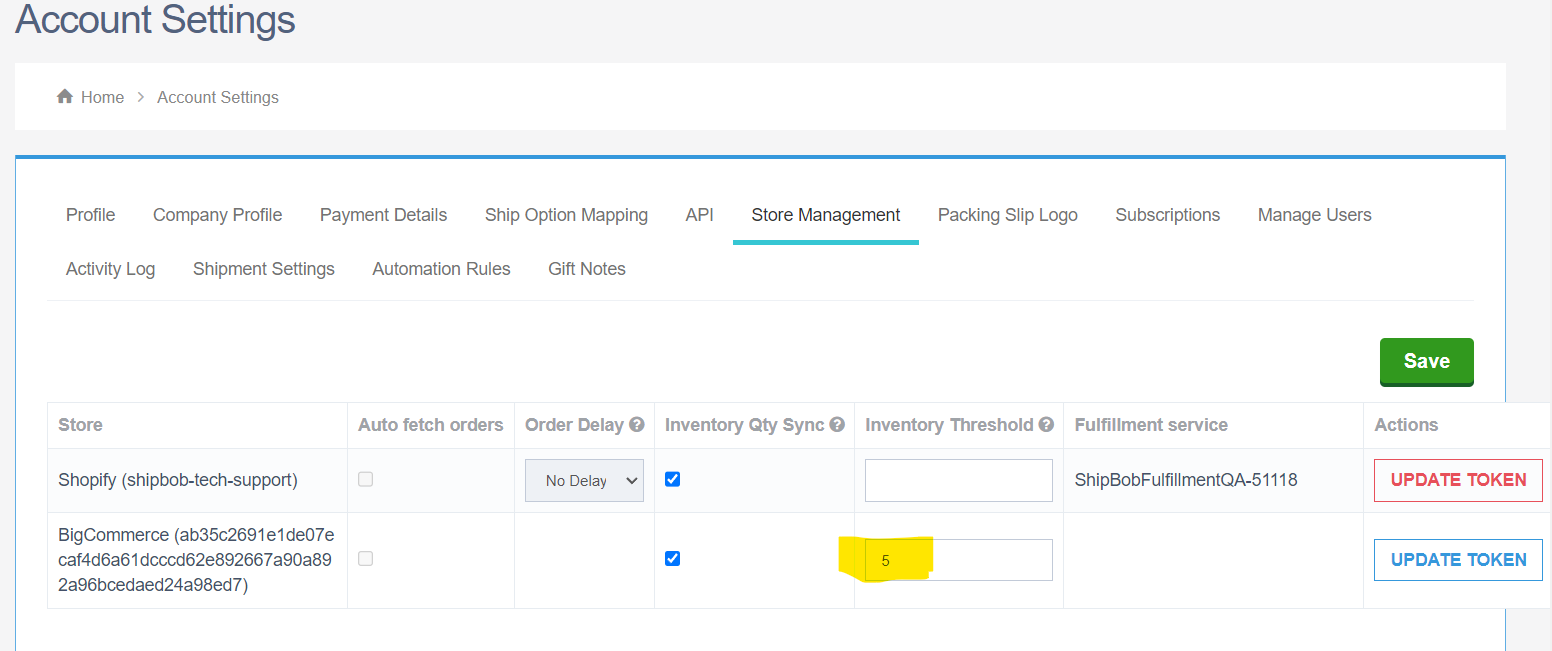
Optional: Inventory Threshold (Safety Buffer)
You can set an inventory threshold to apply a safety buffer when syncing inventory quantities with BigCommerce. When inventory levels fall below the set value, Jetpack will post a sellable quantity of 0 to BigCommerce. To enable inventory thresholds:Ship Option Mapping
Before Jetpack can fulfill orders, you must map your BigCommerce shipping methods to Jetpack ship options. This ensures orders ship using the correct carrier service based on the customer’s selection at checkout. Learn how to configure Ship Option Mapping here.Verifying Your Integration
After installation and configuration, create a test order to verify the integration is working correctly:BigCommerce Integration Features
Automatic Tracking Number Updates
When Jetpack ships an order, the integration automatically updates BigCommerce with tracking information:- Tracking number syncs to the order in BigCommerce
- Order status updates to “Shipped”
- BigCommerce sends a shipment notification email to the customer with the tracking link
- Tracking updates are visible in both the BigCommerce admin and customer account
Product Variants Support
BigCommerce product variants (such as size, color, or style options) sync to Jetpack automatically:- Each variant is treated as a separate SKU in Jetpack
- Variant options are appended to the product name in Jetpack’s Product Catalog
- Inventory is tracked separately for each variant
Gift Messages and Order Comments
Gift Messages: Any gift messages added in BigCommerce sync to Jetpack and are included on the packing slip when the order ships. Order Comments: Comments added to orders in BigCommerce sync to Jetpack and appear in the order details.Split Shipments
If an order ships from multiple Jetpack fulfillment centers or in multiple packages:- Each shipment is updated in BigCommerce separately
- Each tracking number is added to the order
- The customer receives separate tracking notifications for each shipment
Returns Processing
Jetpack does not automatically create return orders in BigCommerce. To process returns:- Create the return order in Jetpack (manually or via API)
- Once processed, manually mark the order as returned or refunded in BigCommerce if needed
Supported BigCommerce Features
| Feature | Supported |
|---|---|
| Product variants | Yes |
| Custom fields | Yes |
| Gift messages | Yes |
| Order comments | Yes |
| Multiple stores | Yes (each store connects separately) |
| BigCommerce Multi-Location Inventory | Yes (requires configuration with Jetpack Care) |
BigCommerce Integration FAQs
How long does it take for orders to appear in Jetpack?
How long does it take for orders to appear in Jetpack?
Can I connect multiple BigCommerce stores to one Jetpack account?
Can I connect multiple BigCommerce stores to one Jetpack account?
What happens if I update product details in BigCommerce?
What happens if I update product details in BigCommerce?
Do I need to configure Multi-Location Inventory manually?
Do I need to configure Multi-Location Inventory manually?
How do I troubleshoot orders that aren't importing?
How do I troubleshoot orders that aren't importing?
Let’s Dive Deeper
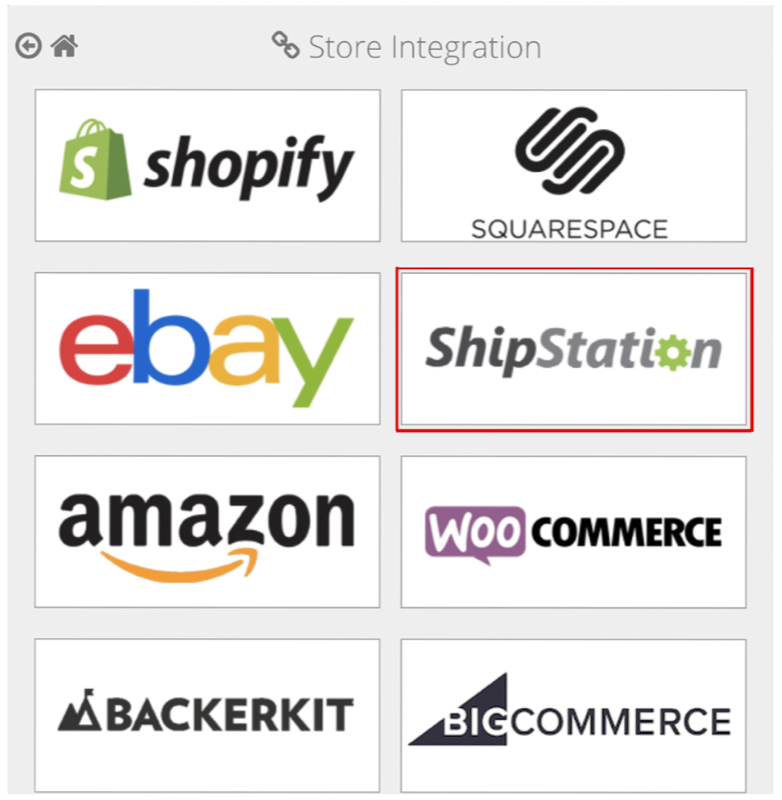
Store Integration Overview
Syncing Products
Importing Orders
Integrations Overview
Ship Option Mapping
Managing Products

Questions? Contact Jetpack Care.
If you have any questions or run into issues, you can always contact Jetpack Care for help. Our team is always here to assist via Slack, phone, or email!