Integrating Skubana with Jetpack enables seamless synchronization of your product catalog, orders, and inventory levels between Skubana’s powerful inventory management platform and Jetpack’s network of fulfillment centers. This integration ensures your Skubana stock accurately reflects what’s physically available in Jetpack’s warehouses, leveraging Jetpack’s 2-day shipping technology across your operations.

About ShipBob Integration References
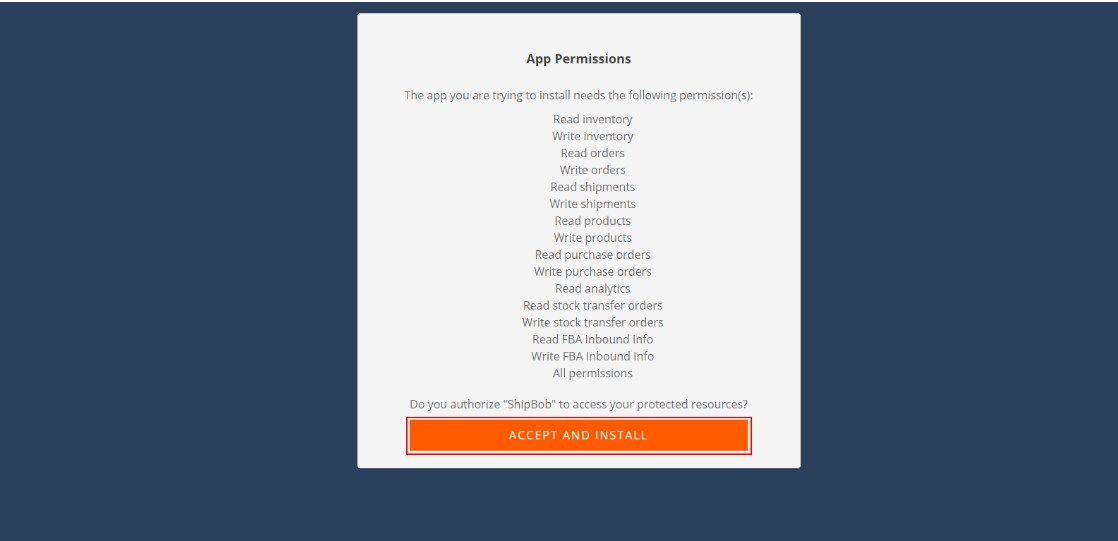
During setup, you’ll authorize the “ShipBob” integration in Skubana. This is expected—Jetpack has licensed ShipBob’s integration infrastructure to provide reliable connections. Your data flows seamlessly to your Jetpack dashboard.
Prerequisites
Before connecting Skubana to Jetpack, ensure you have configured the following in Skubana:- Warehouses in Skubana: Each Jetpack fulfillment center must be set up as a Warehouse in Skubana. You’ll map these warehouses to Jetpack fulfillment centers during the integration setup.
- Order Assignment Rules: Rules that assign orders destined for Jetpack fulfillment to the corresponding Skubana warehouse.
Installing the Skubana Integration
Follow these steps to connect Skubana with your Jetpack dashboard:Navigate to Integrations and select Skubana
In the Jetpack dashboard, click Integrations in the side navigation and select Skubana.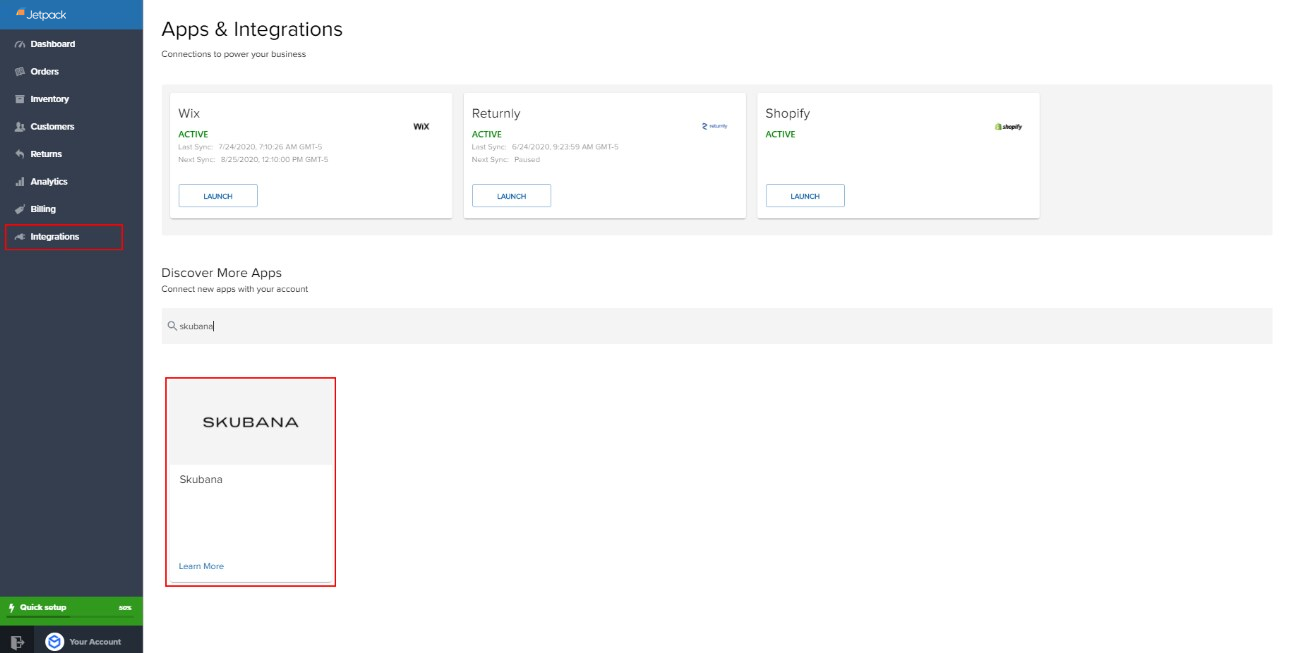

Close the window when you see the success message
After authorization completes, close the popup window to return to Jetpack.
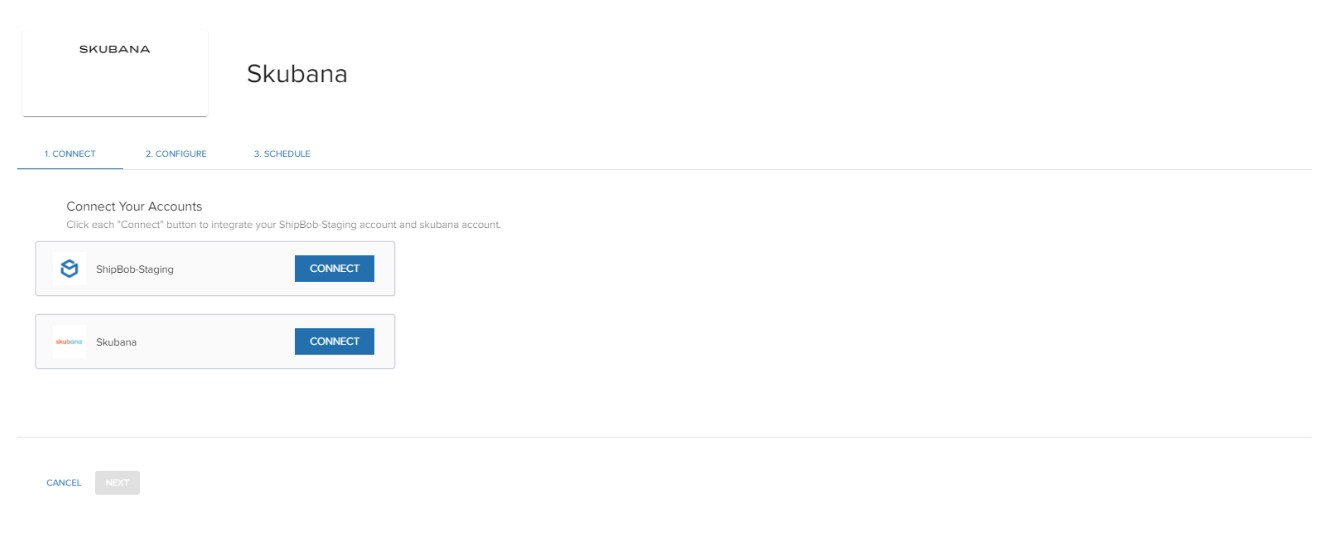
Authorize the integration
On the authorization page, give your integration a name under Enter a Channel, then click Yes, Allow.
Configuring Skubana Settings
After connecting, you’ll configure several settings across multiple screens:Data Sync Options
Select which data to sync to Jetpack:- Products (recommended for initial sync only)
- Orders
- Tracking information
Warehouse Mapping
Configure how Skubana warehouses map to Jetpack fulfillment centers:| Setting | Description |
|---|---|
| Skubana Dummy Warehouse (mandatory) | Choose the dummy warehouse that captures orders for Jetpack. Jetpack will replace it with the actual fulfillment center after fulfillment. |
| Upload Tracking & FC Allocation | Enable to have Jetpack push tracking details and update the warehouse in Skubana. |
| Sync Inventory Stock Counts | Enable to send on-hand inventory levels (bundles excluded) back to Skubana. |
Start Shipping Date
Choose the date Jetpack begins importing and shipping orders. You can select a date up to 120 days in the past or a future date. Orders created on or after this date will be imported.Mapping Fulfillment Centers
For each Jetpack fulfillment center you want to use:
You can revisit and change these settings at any time.
Scheduling Syncs with Skubana
After saving your configuration, set up automatic syncing:Choose a sync frequency from the dropdown
Select your preferred frequency (e.g., every 30 minutes, hourly, daily).
- Click Sync Now to trigger an immediate sync
- Use Connection Settings or Sync Schedule links to make changes
- View Sync Logs for a history of sync jobs
How the Integration Works
Product Catalog Sync
- Each product in Skubana is assigned a master SKU that is used as the unique identifier in Jetpack
- If your Skubana products include variants (e.g., different colors or sizes), they are synced as separate products; if not, only the main product is synced
- Product images are not imported with the Skubana integration
Order Syncing
- You can sync orders manually by clicking Sync Now in the Skubana integration settings or set a sync schedule for automatic syncing
- Orders that contain products not yet synced with Jetpack will trigger automatic product creation
- Once an order is fulfilled, Jetpack uploads a unique tracking number to the order details and updates Skubana with the fulfillment center information
Inventory Quantity Sync
Jetpack updates inventory levels (pickable quantity) in Skubana twice a day. Internal or external transit quantities are excluded from these on-hand calculations.Start Shipping Date
You can define a start shipping date (past or future, up to 120 days) to control when orders begin to be imported and fulfilled.Order Routing for 2-Day Shipping
To leverage Jetpack’s 2-day shipping technology, all orders from Skubana are initially designated to a “holding warehouse.” Jetpack then routes orders and updates Skubana with the actual fulfillment center. This may temporarily affect inventory accuracy on Skubana until the update occurs.What the Integration Does Not Support
By leveraging the Skubana integration, you can streamline your operations by automatically syncing products, orders, and inventory levels between the two platforms. For features not supported by the integration, such as those below, you may need to manage those processes separately.| Limitation | Details |
|---|---|
| Order Splitting | Split orders in Skubana are not imported. If Jetpack splits an order, only the first shipment receives tracking updates. |
| Purchase Orders | Purchase orders are not synced because Jetpack requires additional information to process them. |
| Stock Transfers | Stock transfers created in Skubana must be initiated separately in Jetpack. |
| Bundling Work Orders | Work orders (such as bundling or kitting) must be created directly in the Jetpack dashboard. |
| Canceled Orders | Canceled orders are not synced. You must manually cancel the order in both systems for consistency. |
| Automation Rules | The integration does not support setting up automation rules within Jetpack. However, you can use Skubana’s robust rules engine to modify or route orders before they are assigned to Jetpack. |
Uninstalling the Skubana Integration
If you need to disconnect your Skubana integration: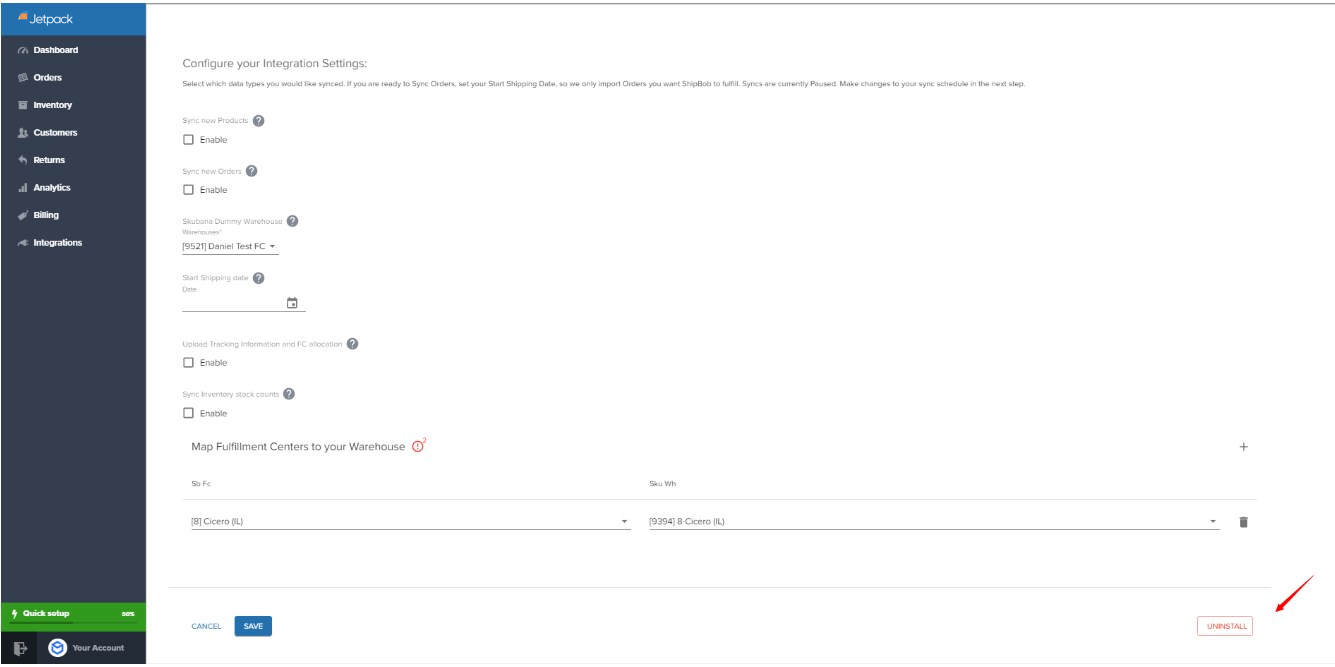
Let’s Dive Deeper
Other Integrations Overview
Back to the main integrations guide
Integrations + Apps Overview
Learn about managing all your integrations
Syncing Your Products
Understand how product syncing works
Importing Your Orders
Learn about order import methods
Managing Inventory
Monitor and manage your inventory levels
Order Management
View and manage your orders

Questions? Contact Jetpack Care.
If you have any questions or run into issues, you can always contact Jetpack Care for help. Our team is always here to assist via Slack, phone, or email!